Impact Driver with Socket attachment Greatly Speeds up The Process
0.
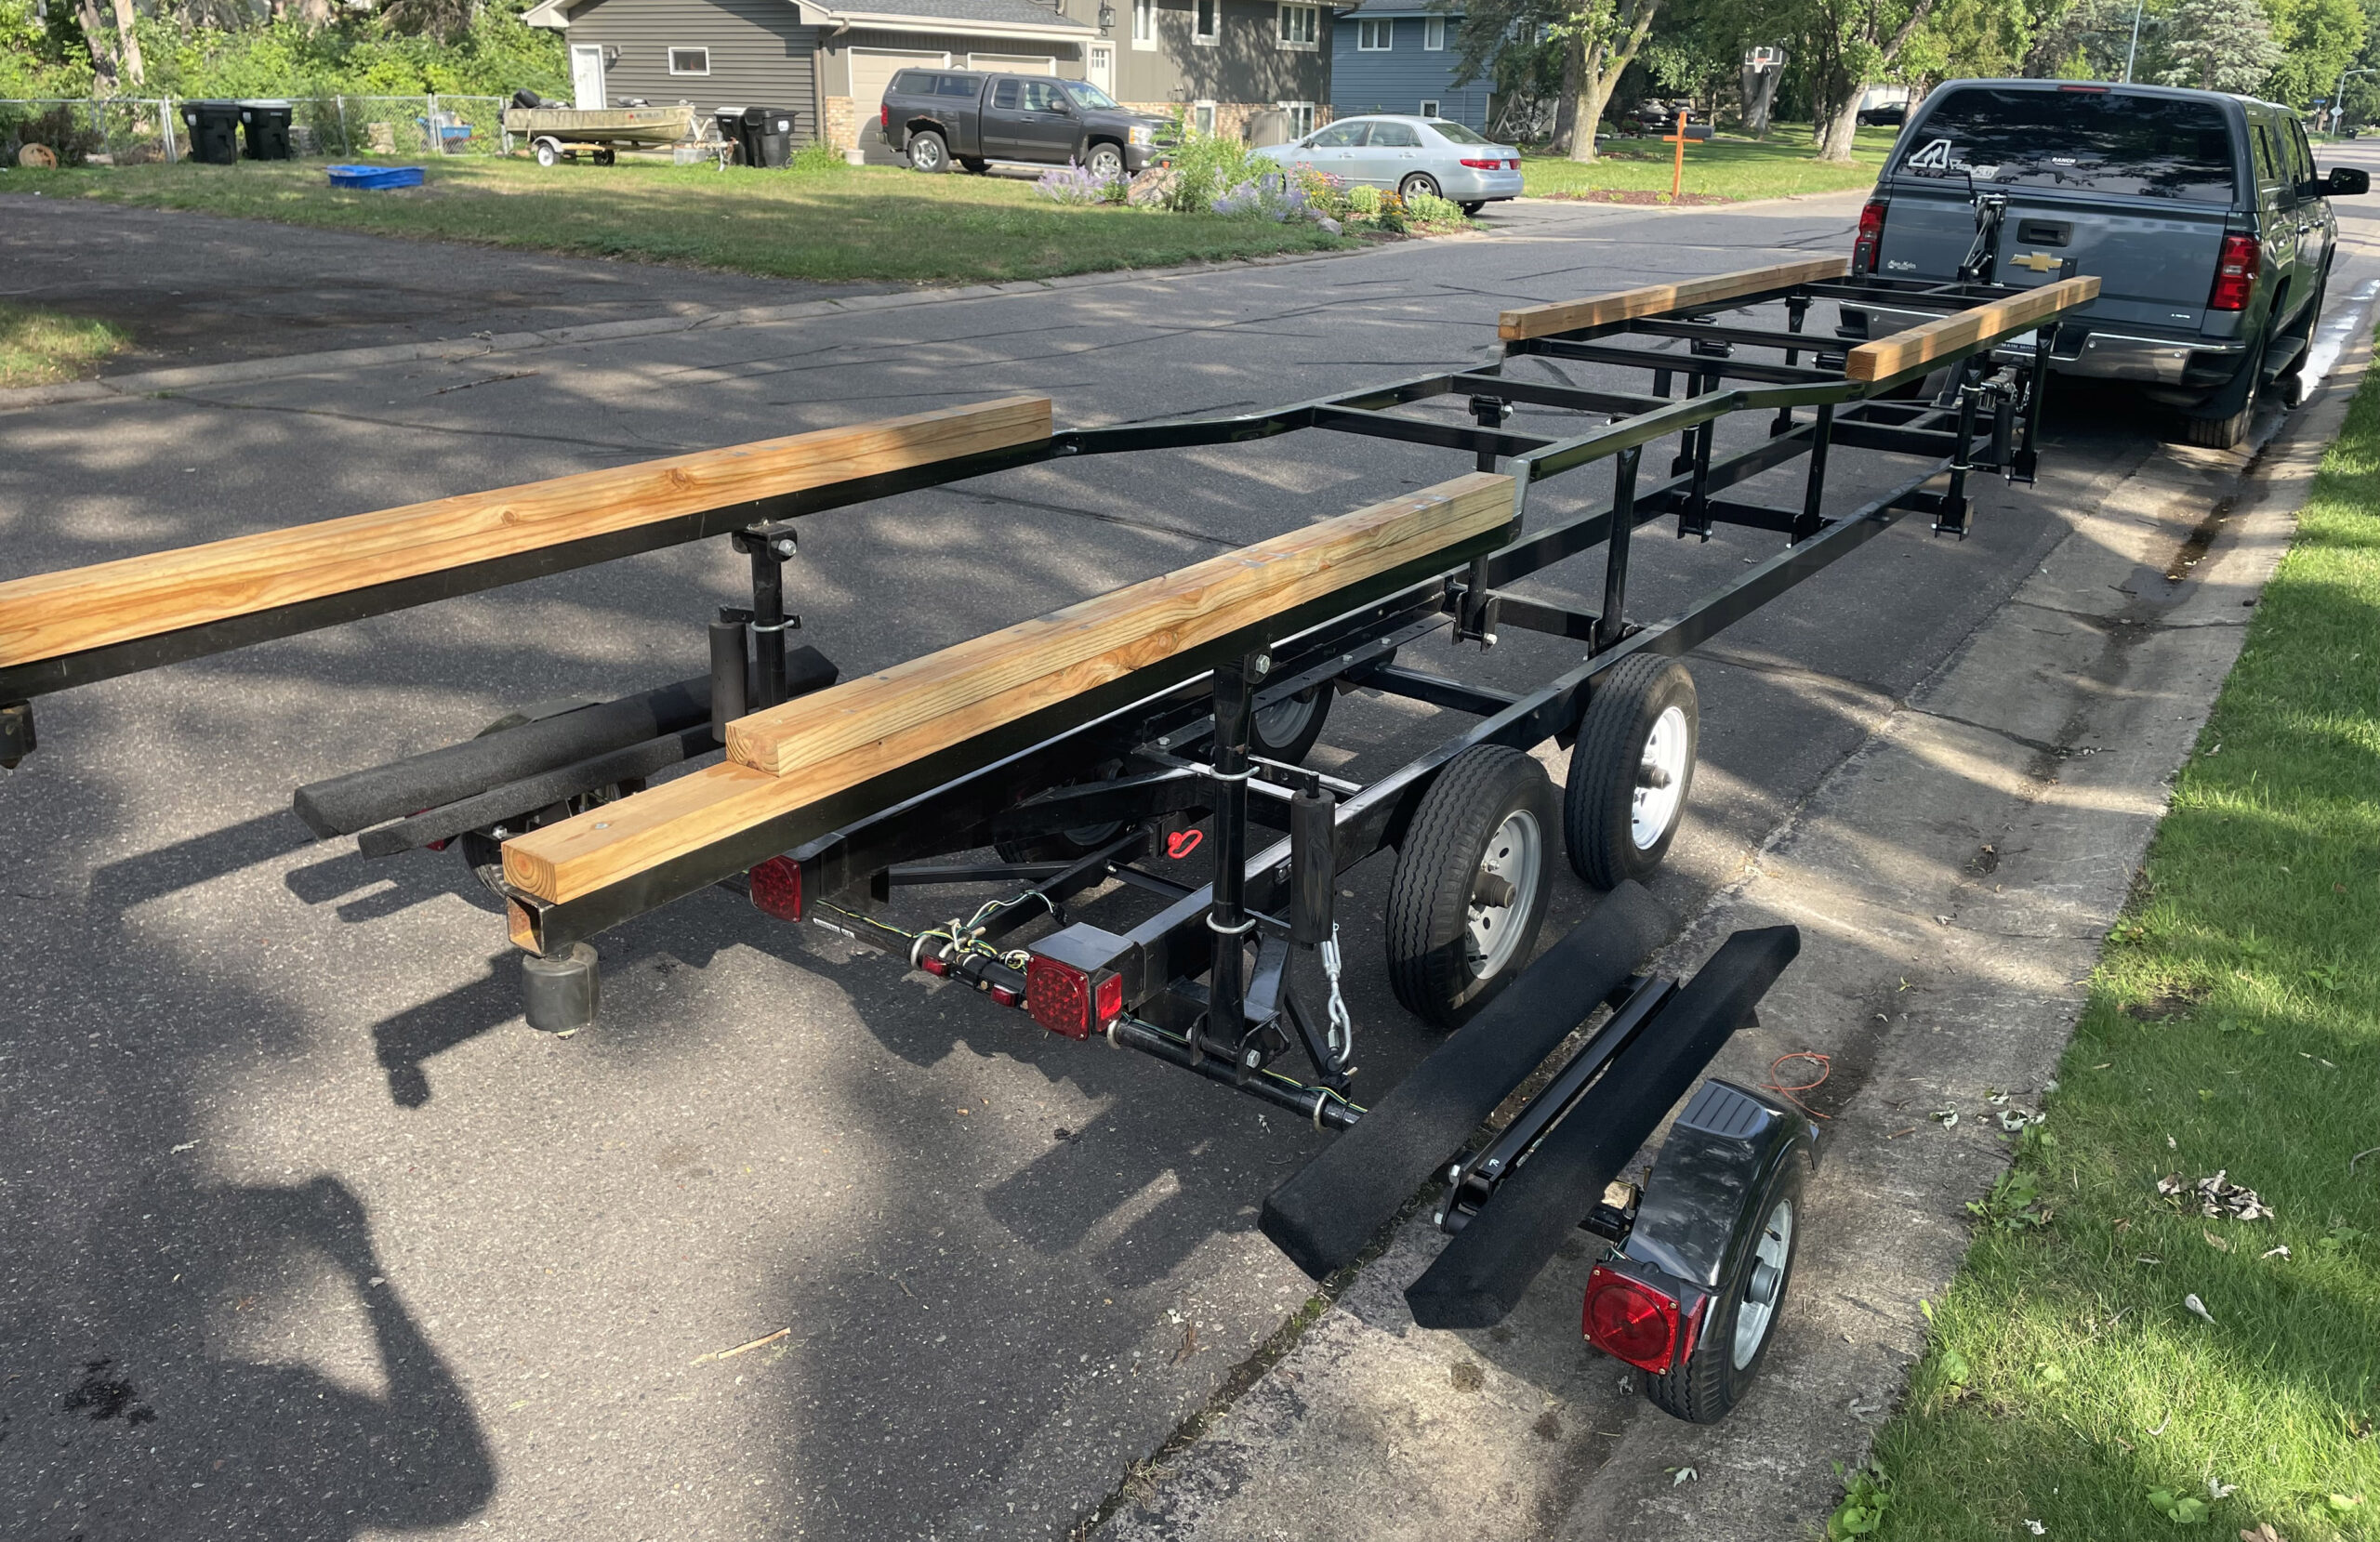
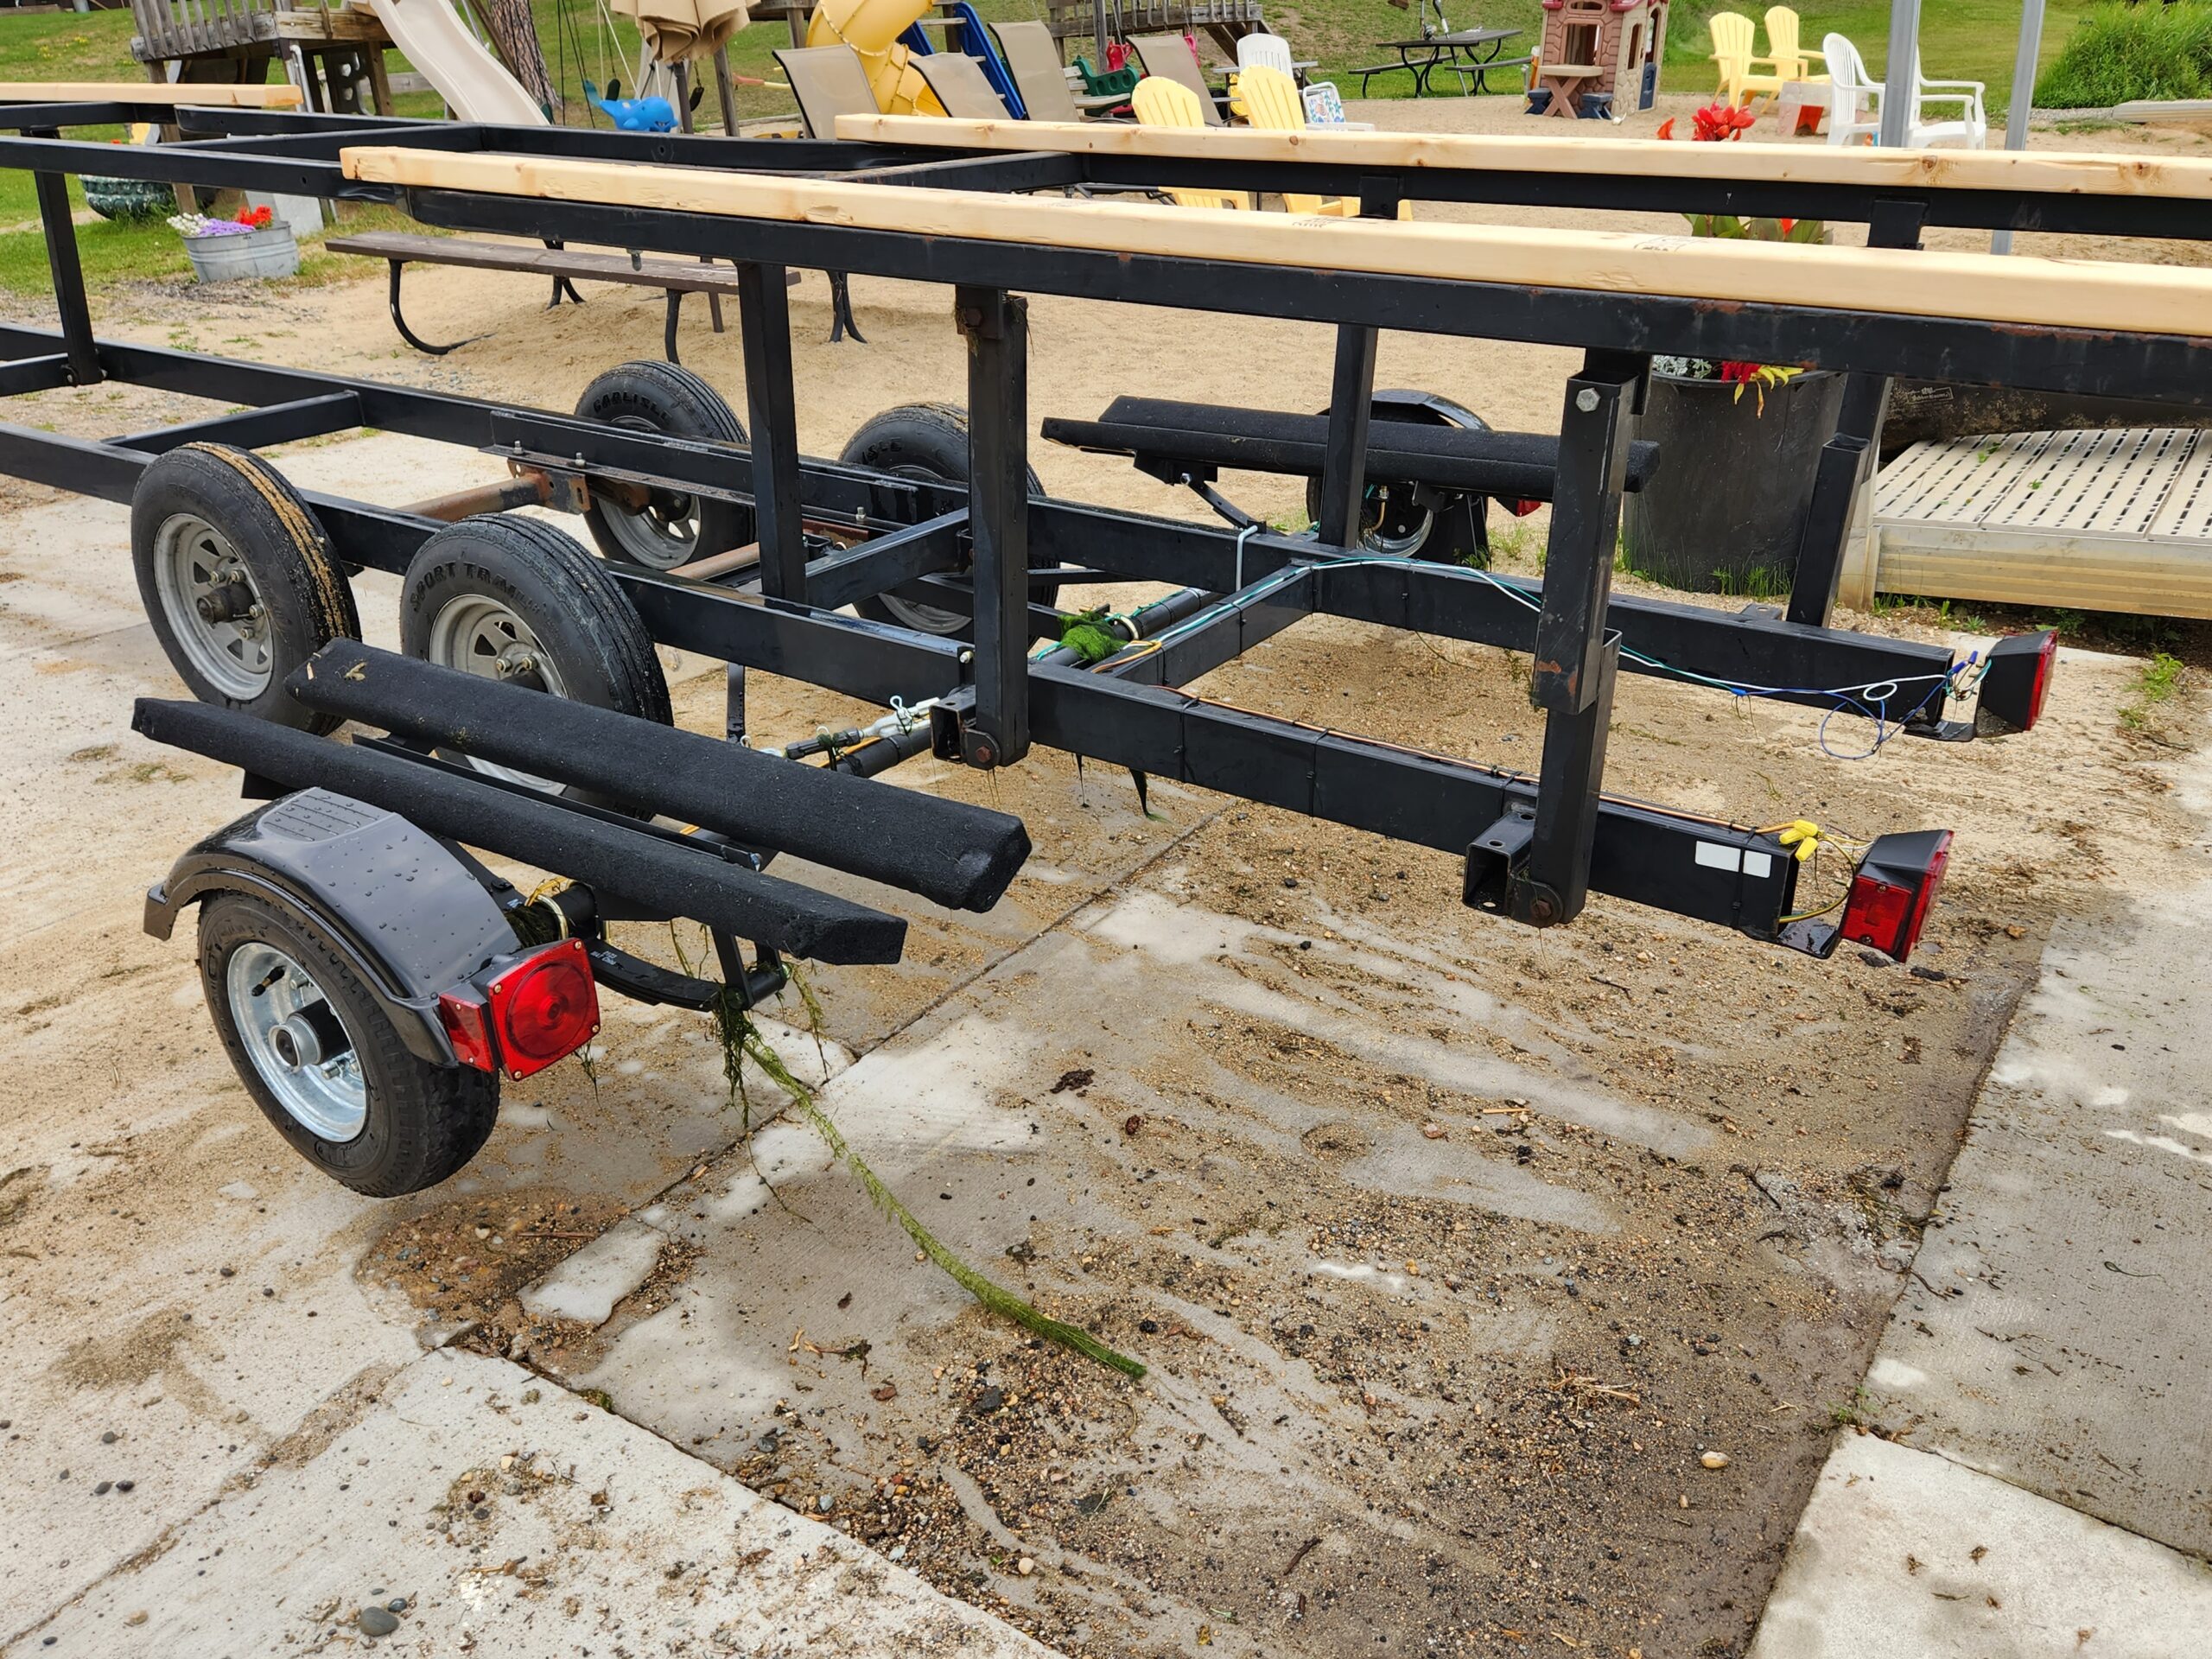
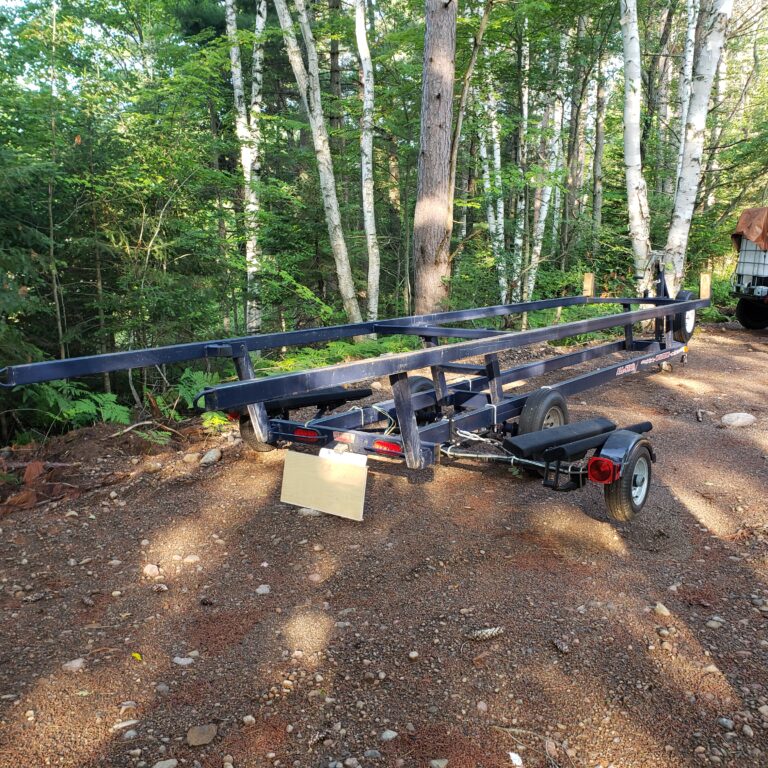
Setting up your trailer.
You may have to install wooden spacer blocks on top of your trailer to fit the stabilizers underneath.
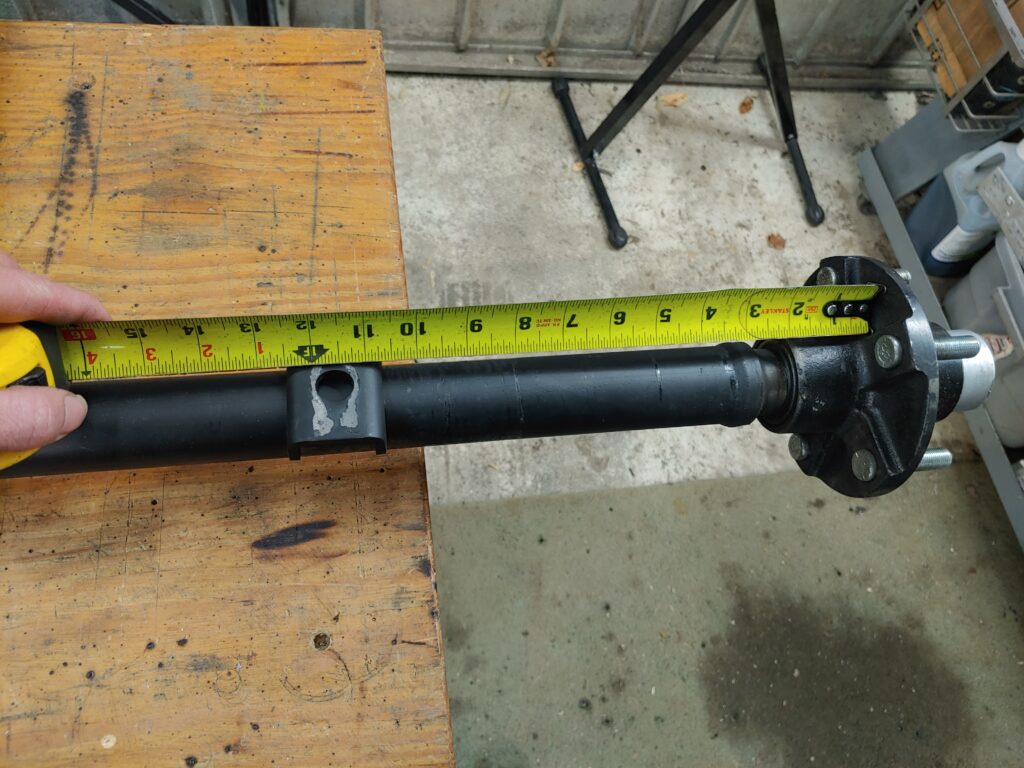
First you will need to measure your Keel to Keel. If it is greater then 73″ you will need to use the OverSlung-LeafSpring configuration which will require your ground to pontoon clearance to be 16¾”.
You may need to modify your trailer by adding wood blocks to the top of your trailer: a combination of 2×4, 2×2, 1×2, 2×3’s, etc. To achieve a 16 ¾” ground to pontoon clearance.
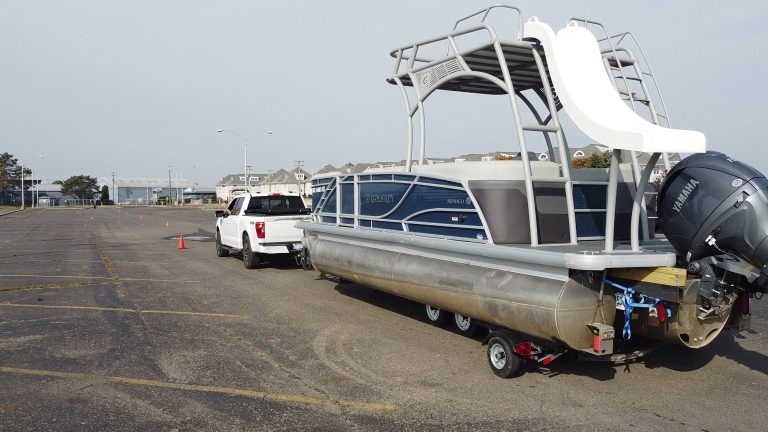
Below is an example a Newer Pontoon with LiftingStrakes, a wide Deck width of 8 ½’ foot or 102″ and a Keel to Keel of 78″ [characteristic of Newer Pontoons]
Here are two examples of wood spacer blocks being used.
If your Keel to Keel is less then 73″ [typical of older pontoons] then you may have the option to use the UnderSlung-LeafSpring configuration which will require your ground to pontoon clearance to be 13 ¼”
You may need modify your trailer by adding wood blocks to the top of your trailer: such as 2×4, 2×2, 1×2, 2×3’s, etc. To achieve a 13 ¼” ground to pontoon clearance.
FYI: this configuration will debilitate you trailers ability to carry newer pontoons with wider bigger pontoons.
1.
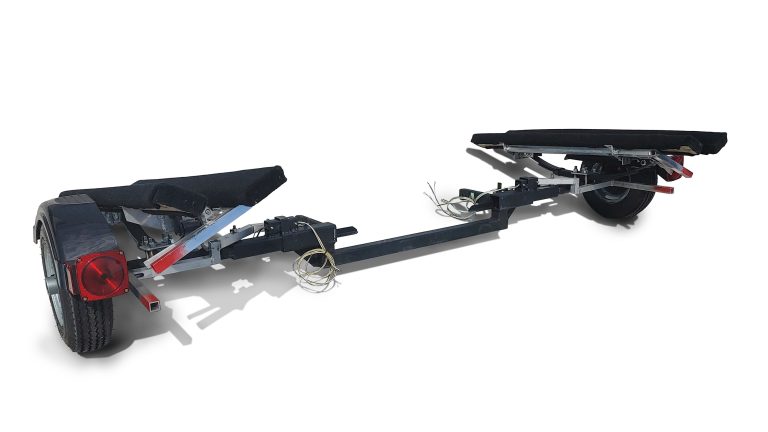
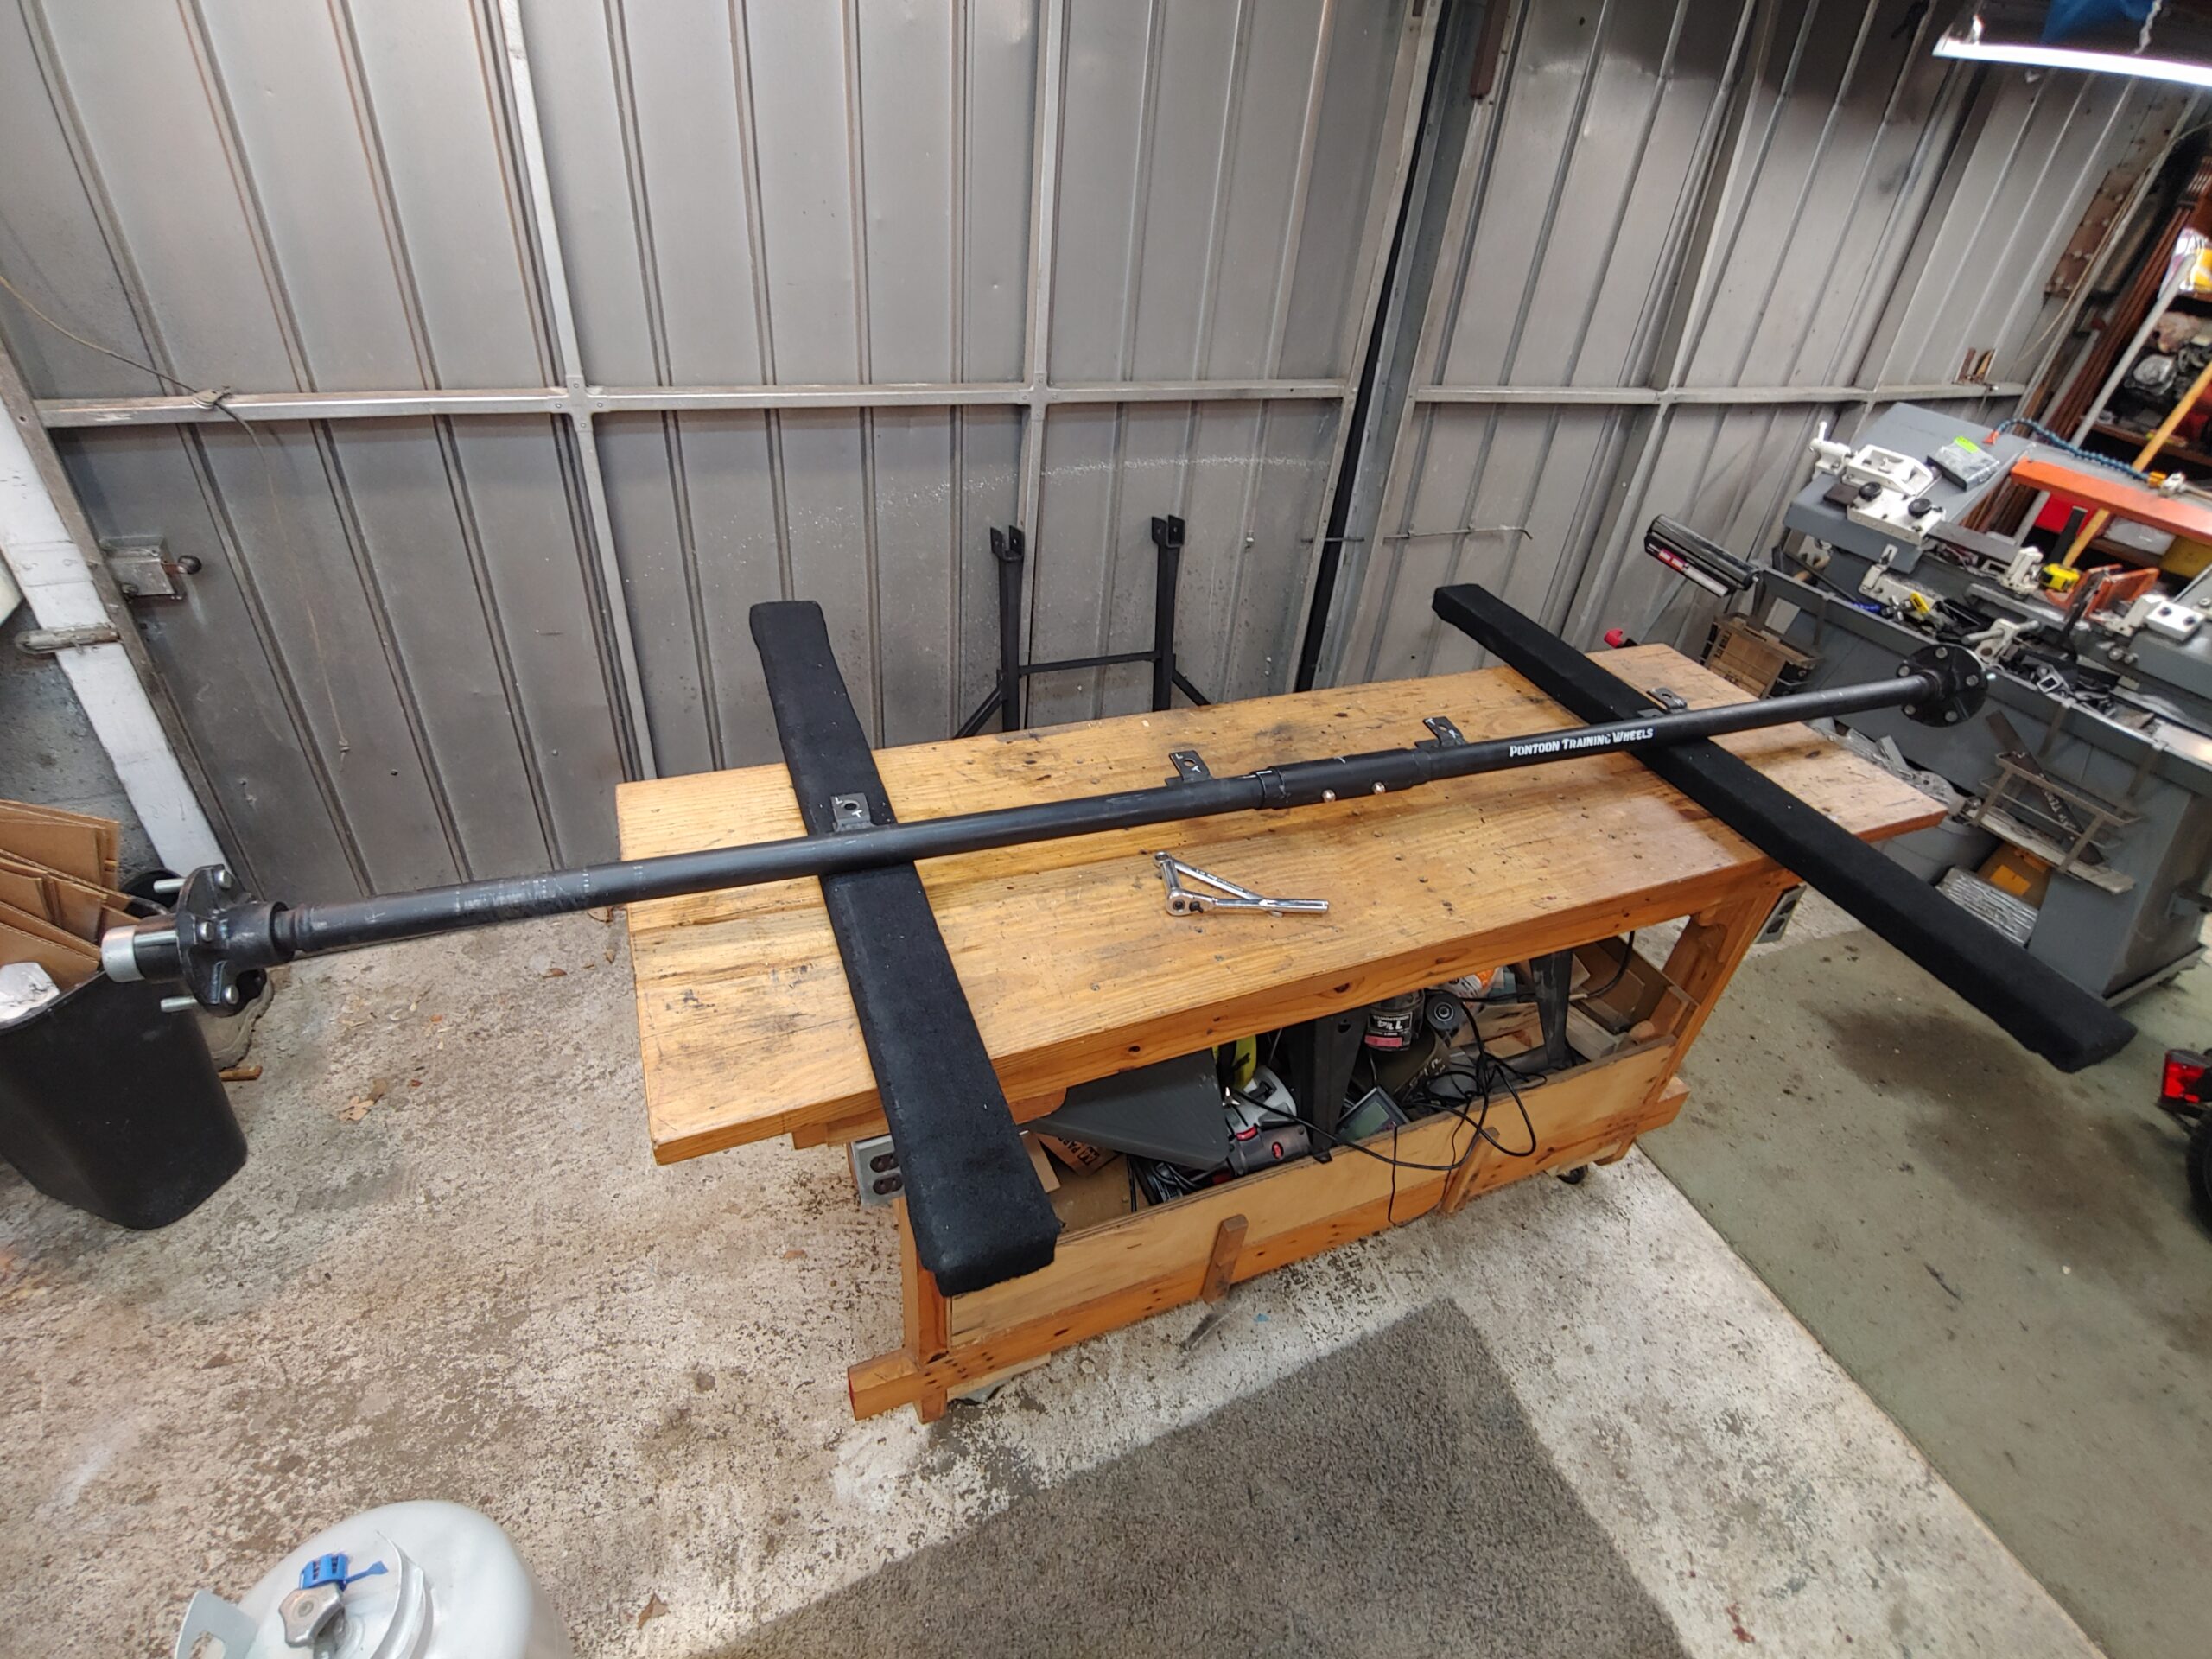
Assembling
The Arms
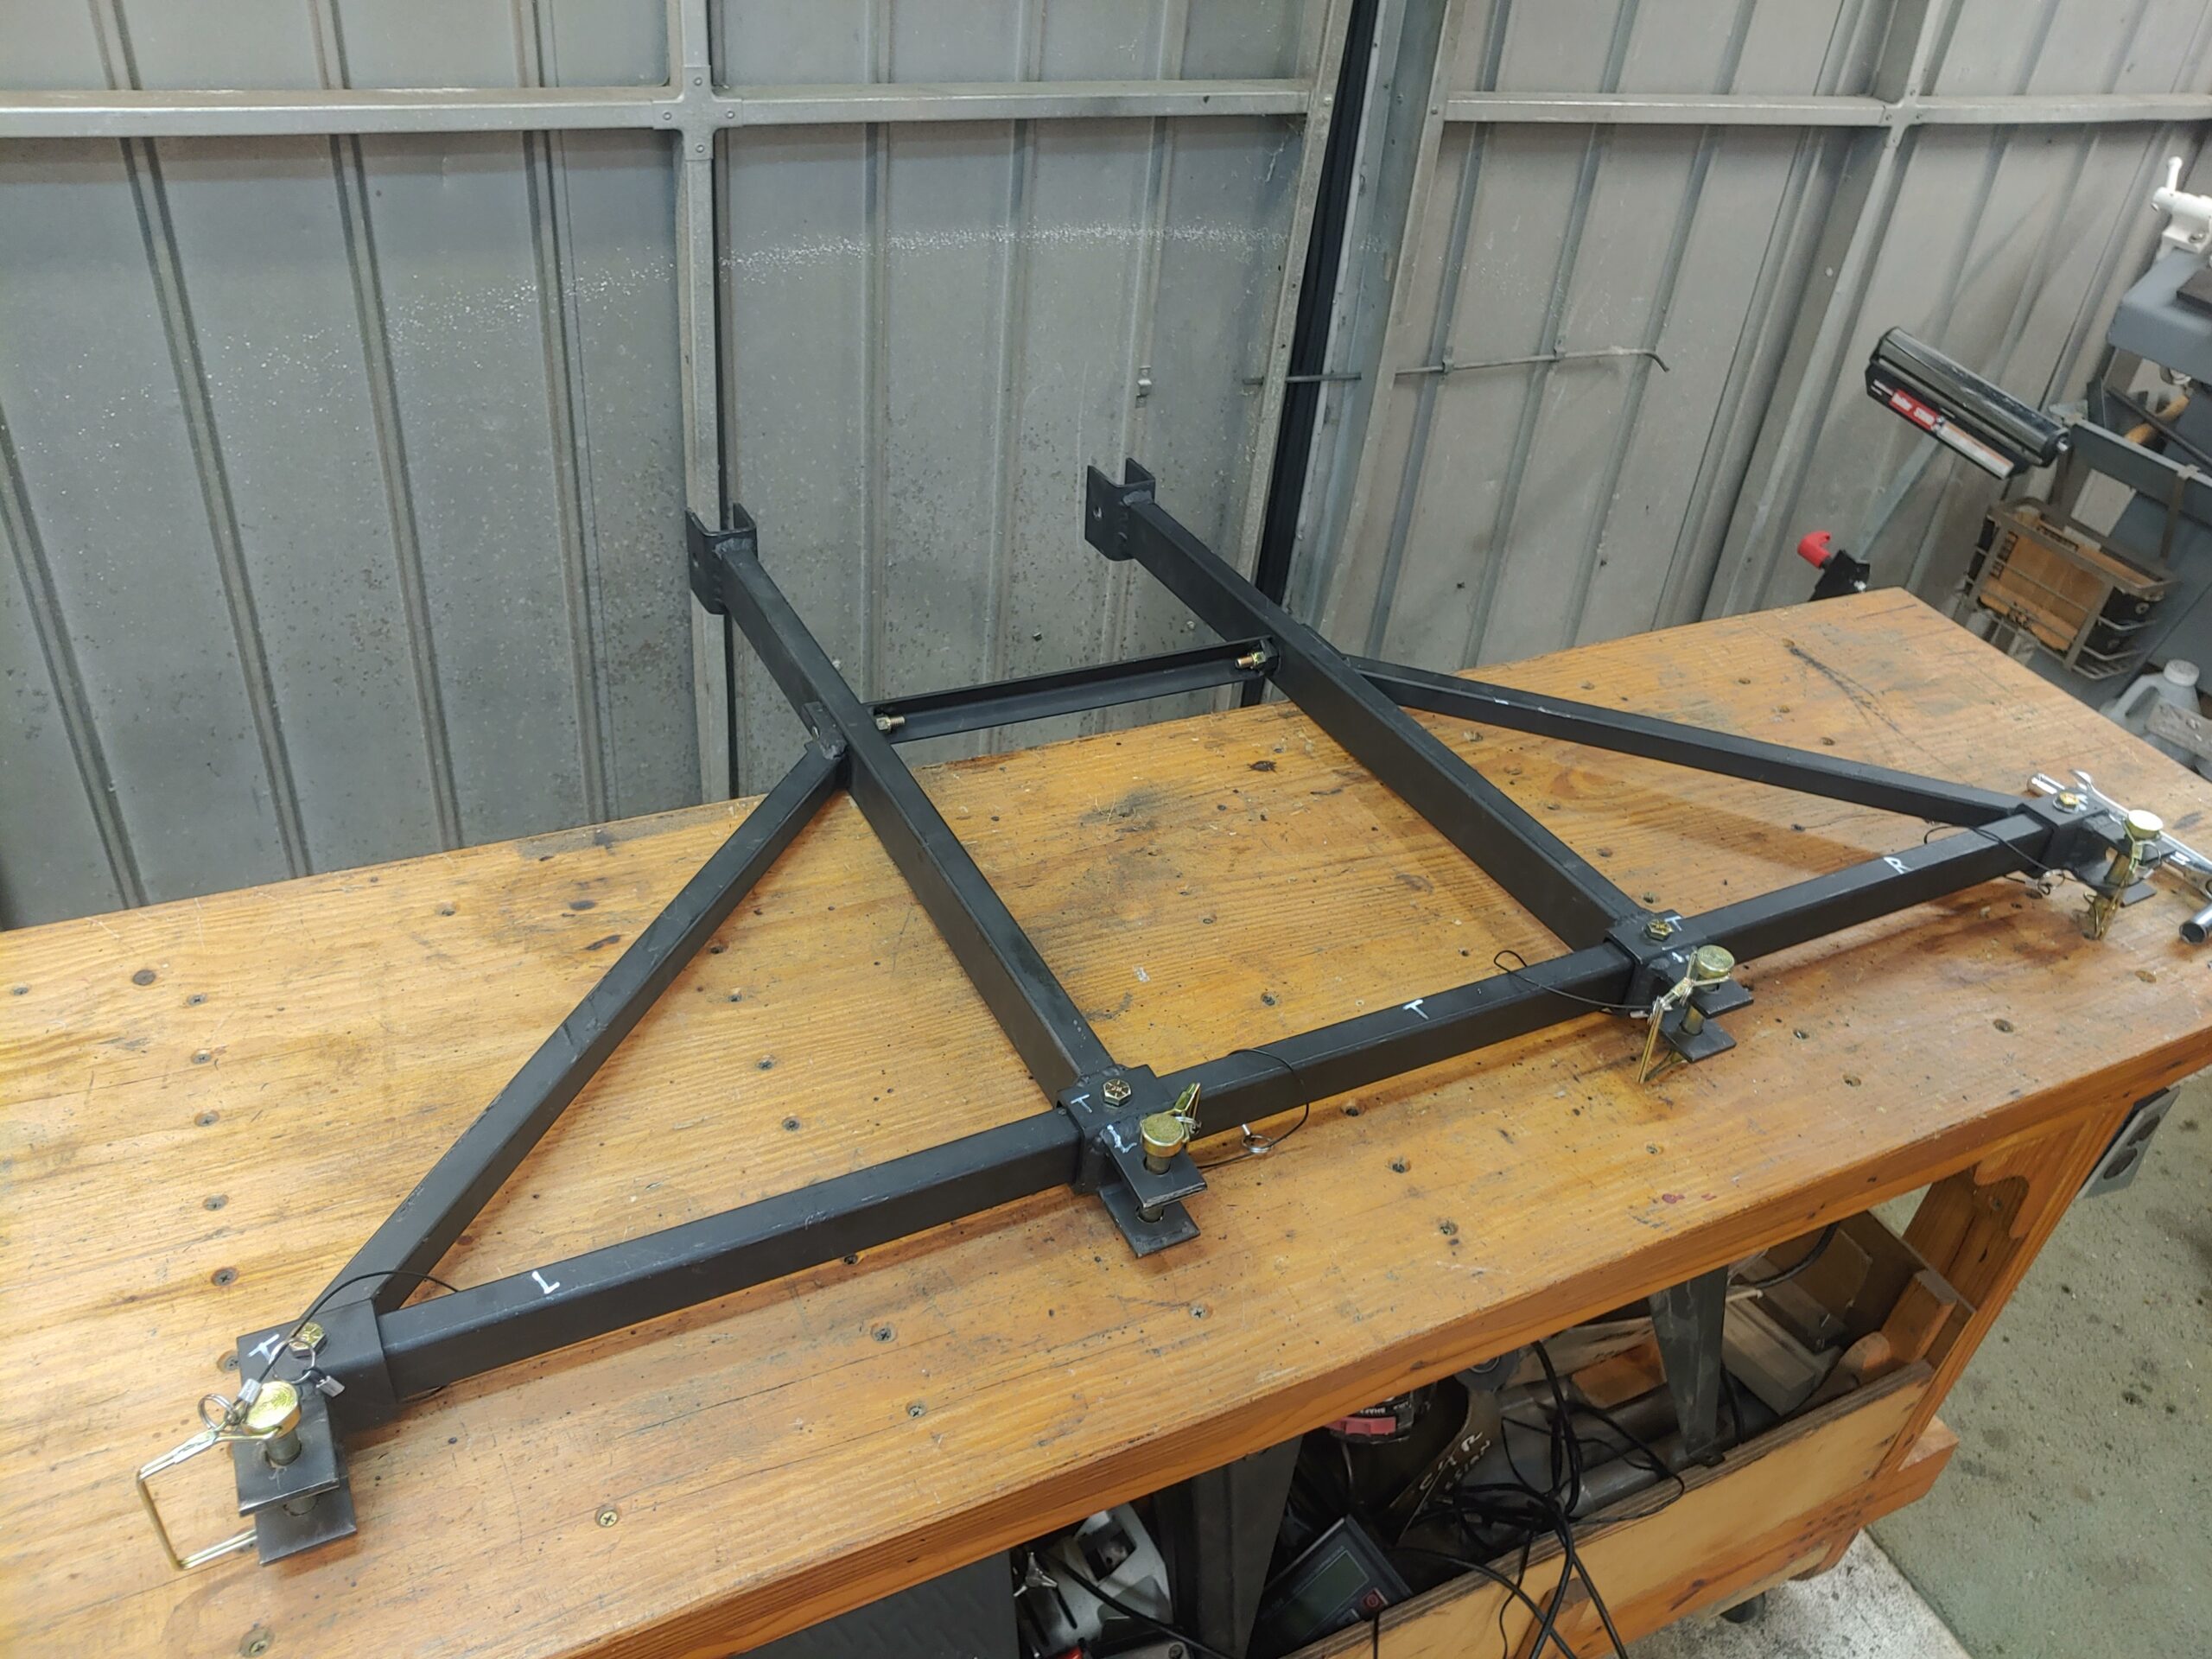
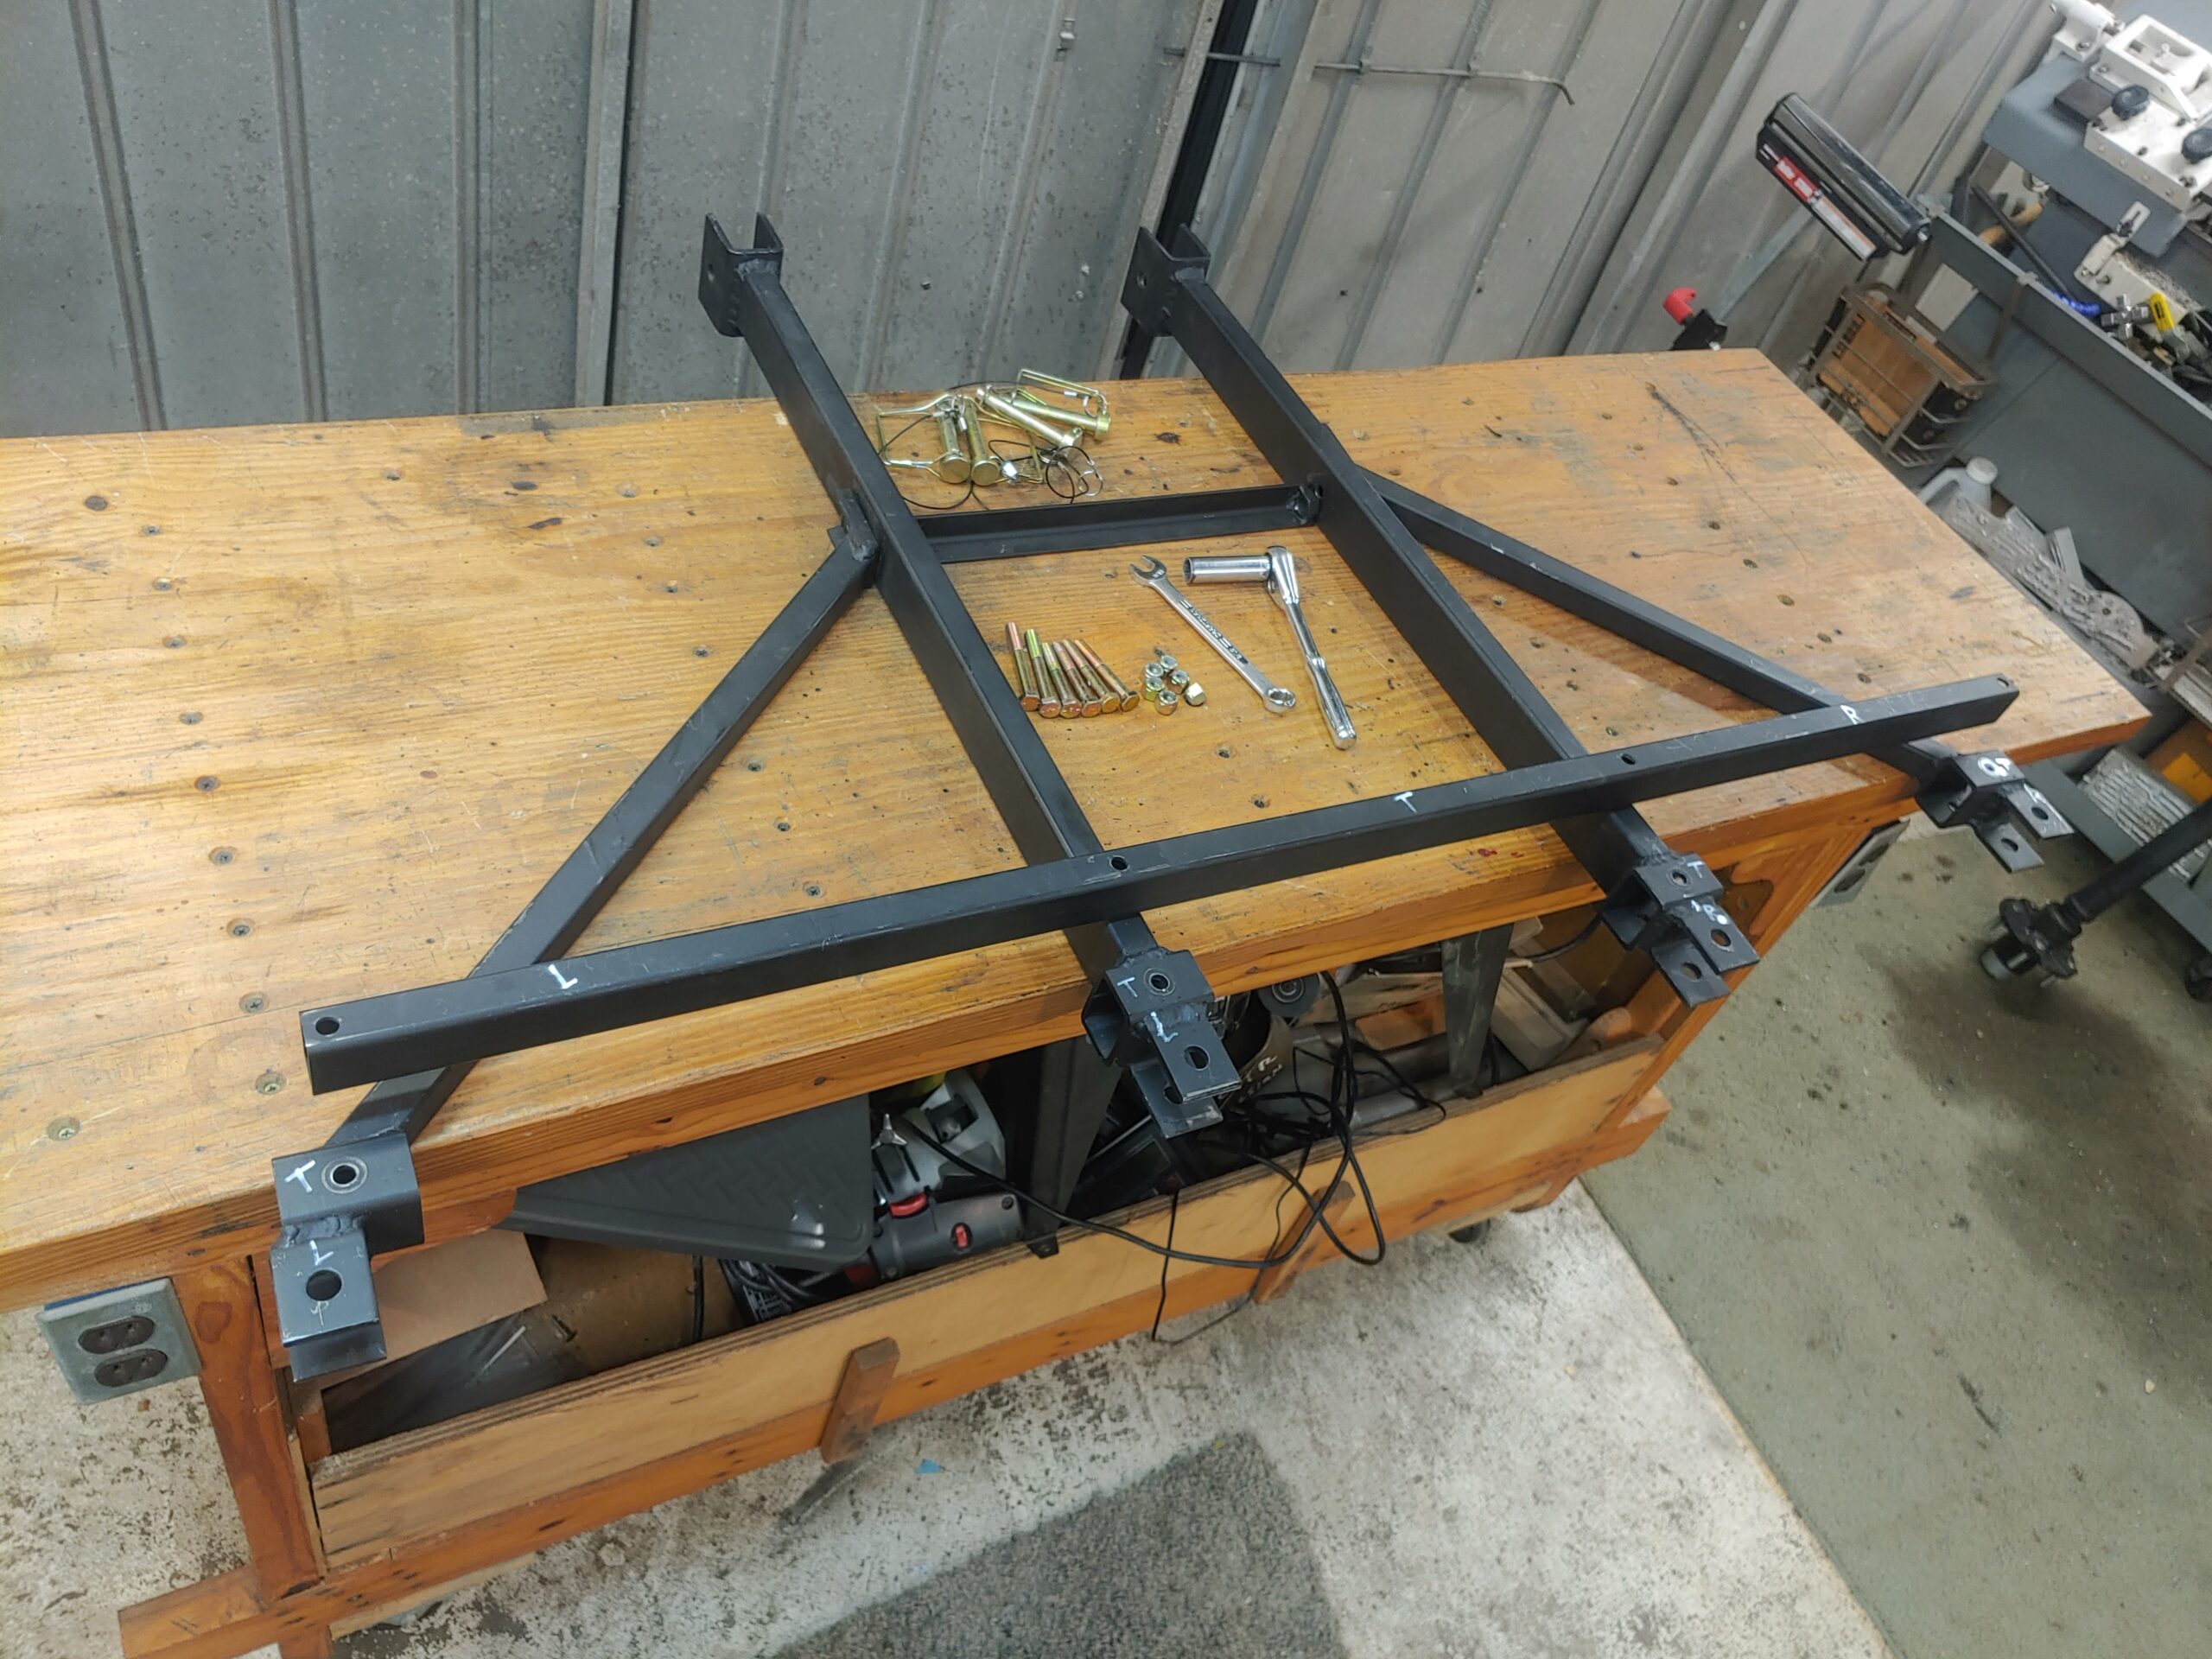
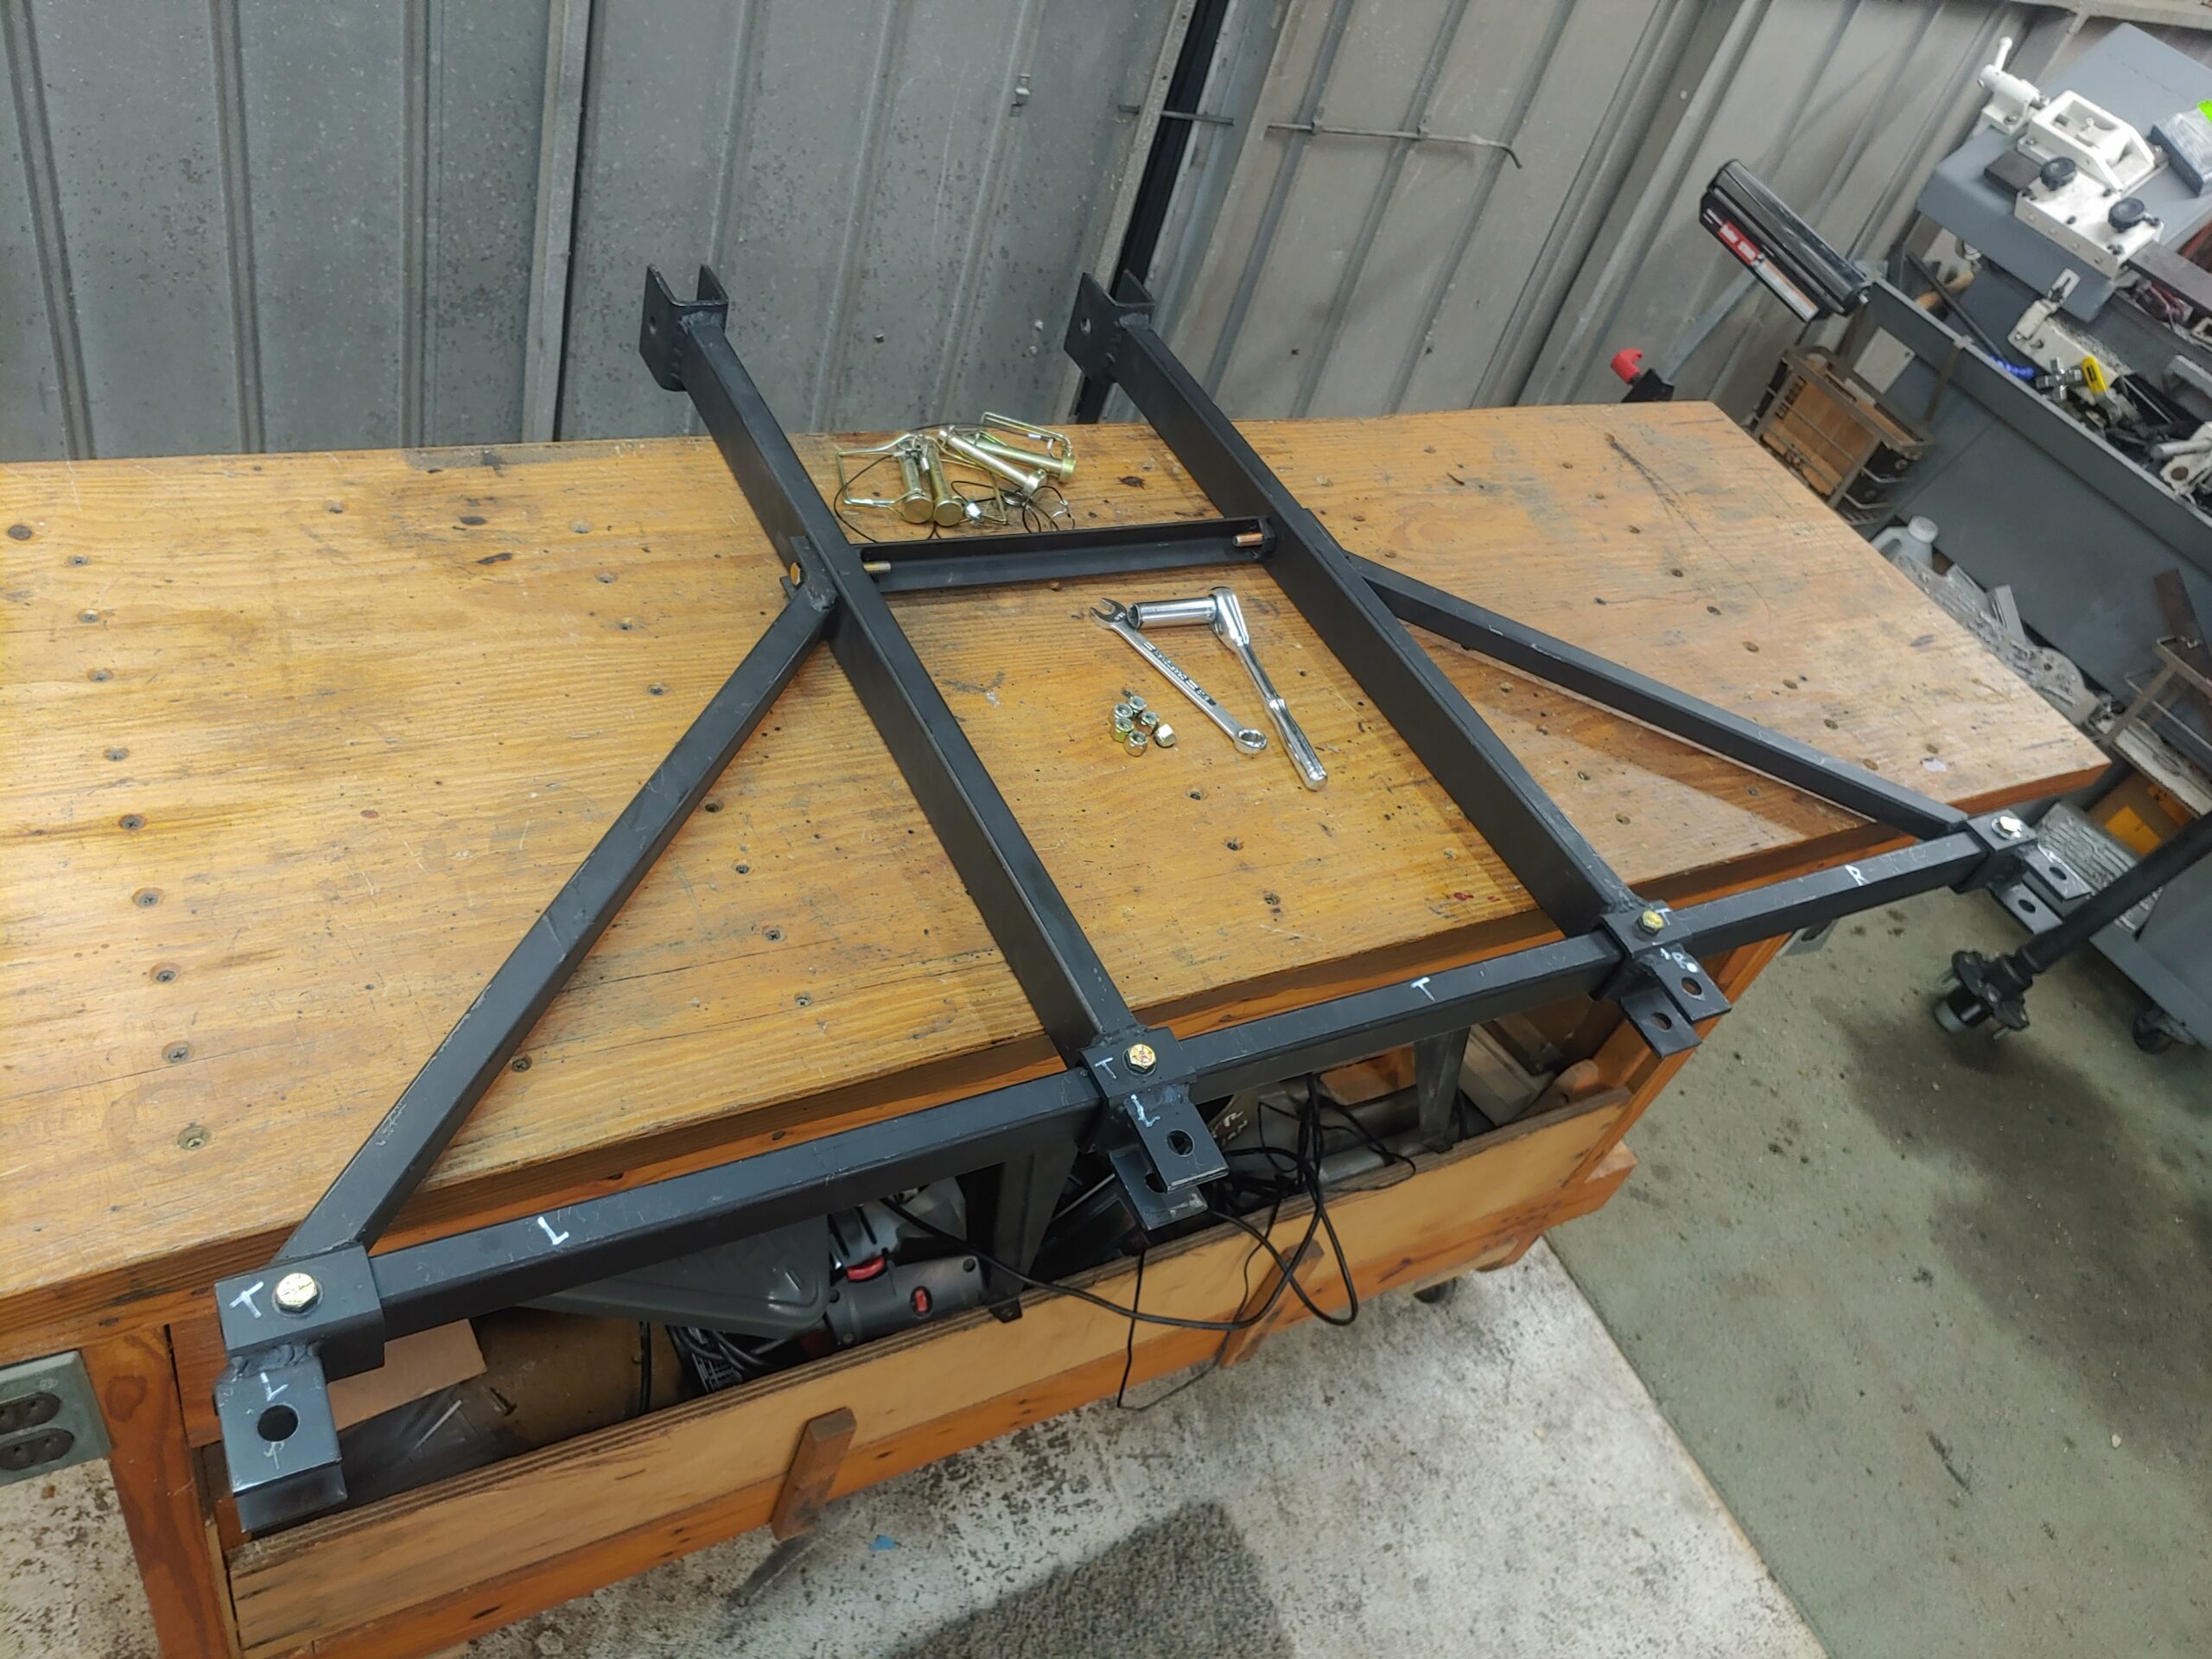
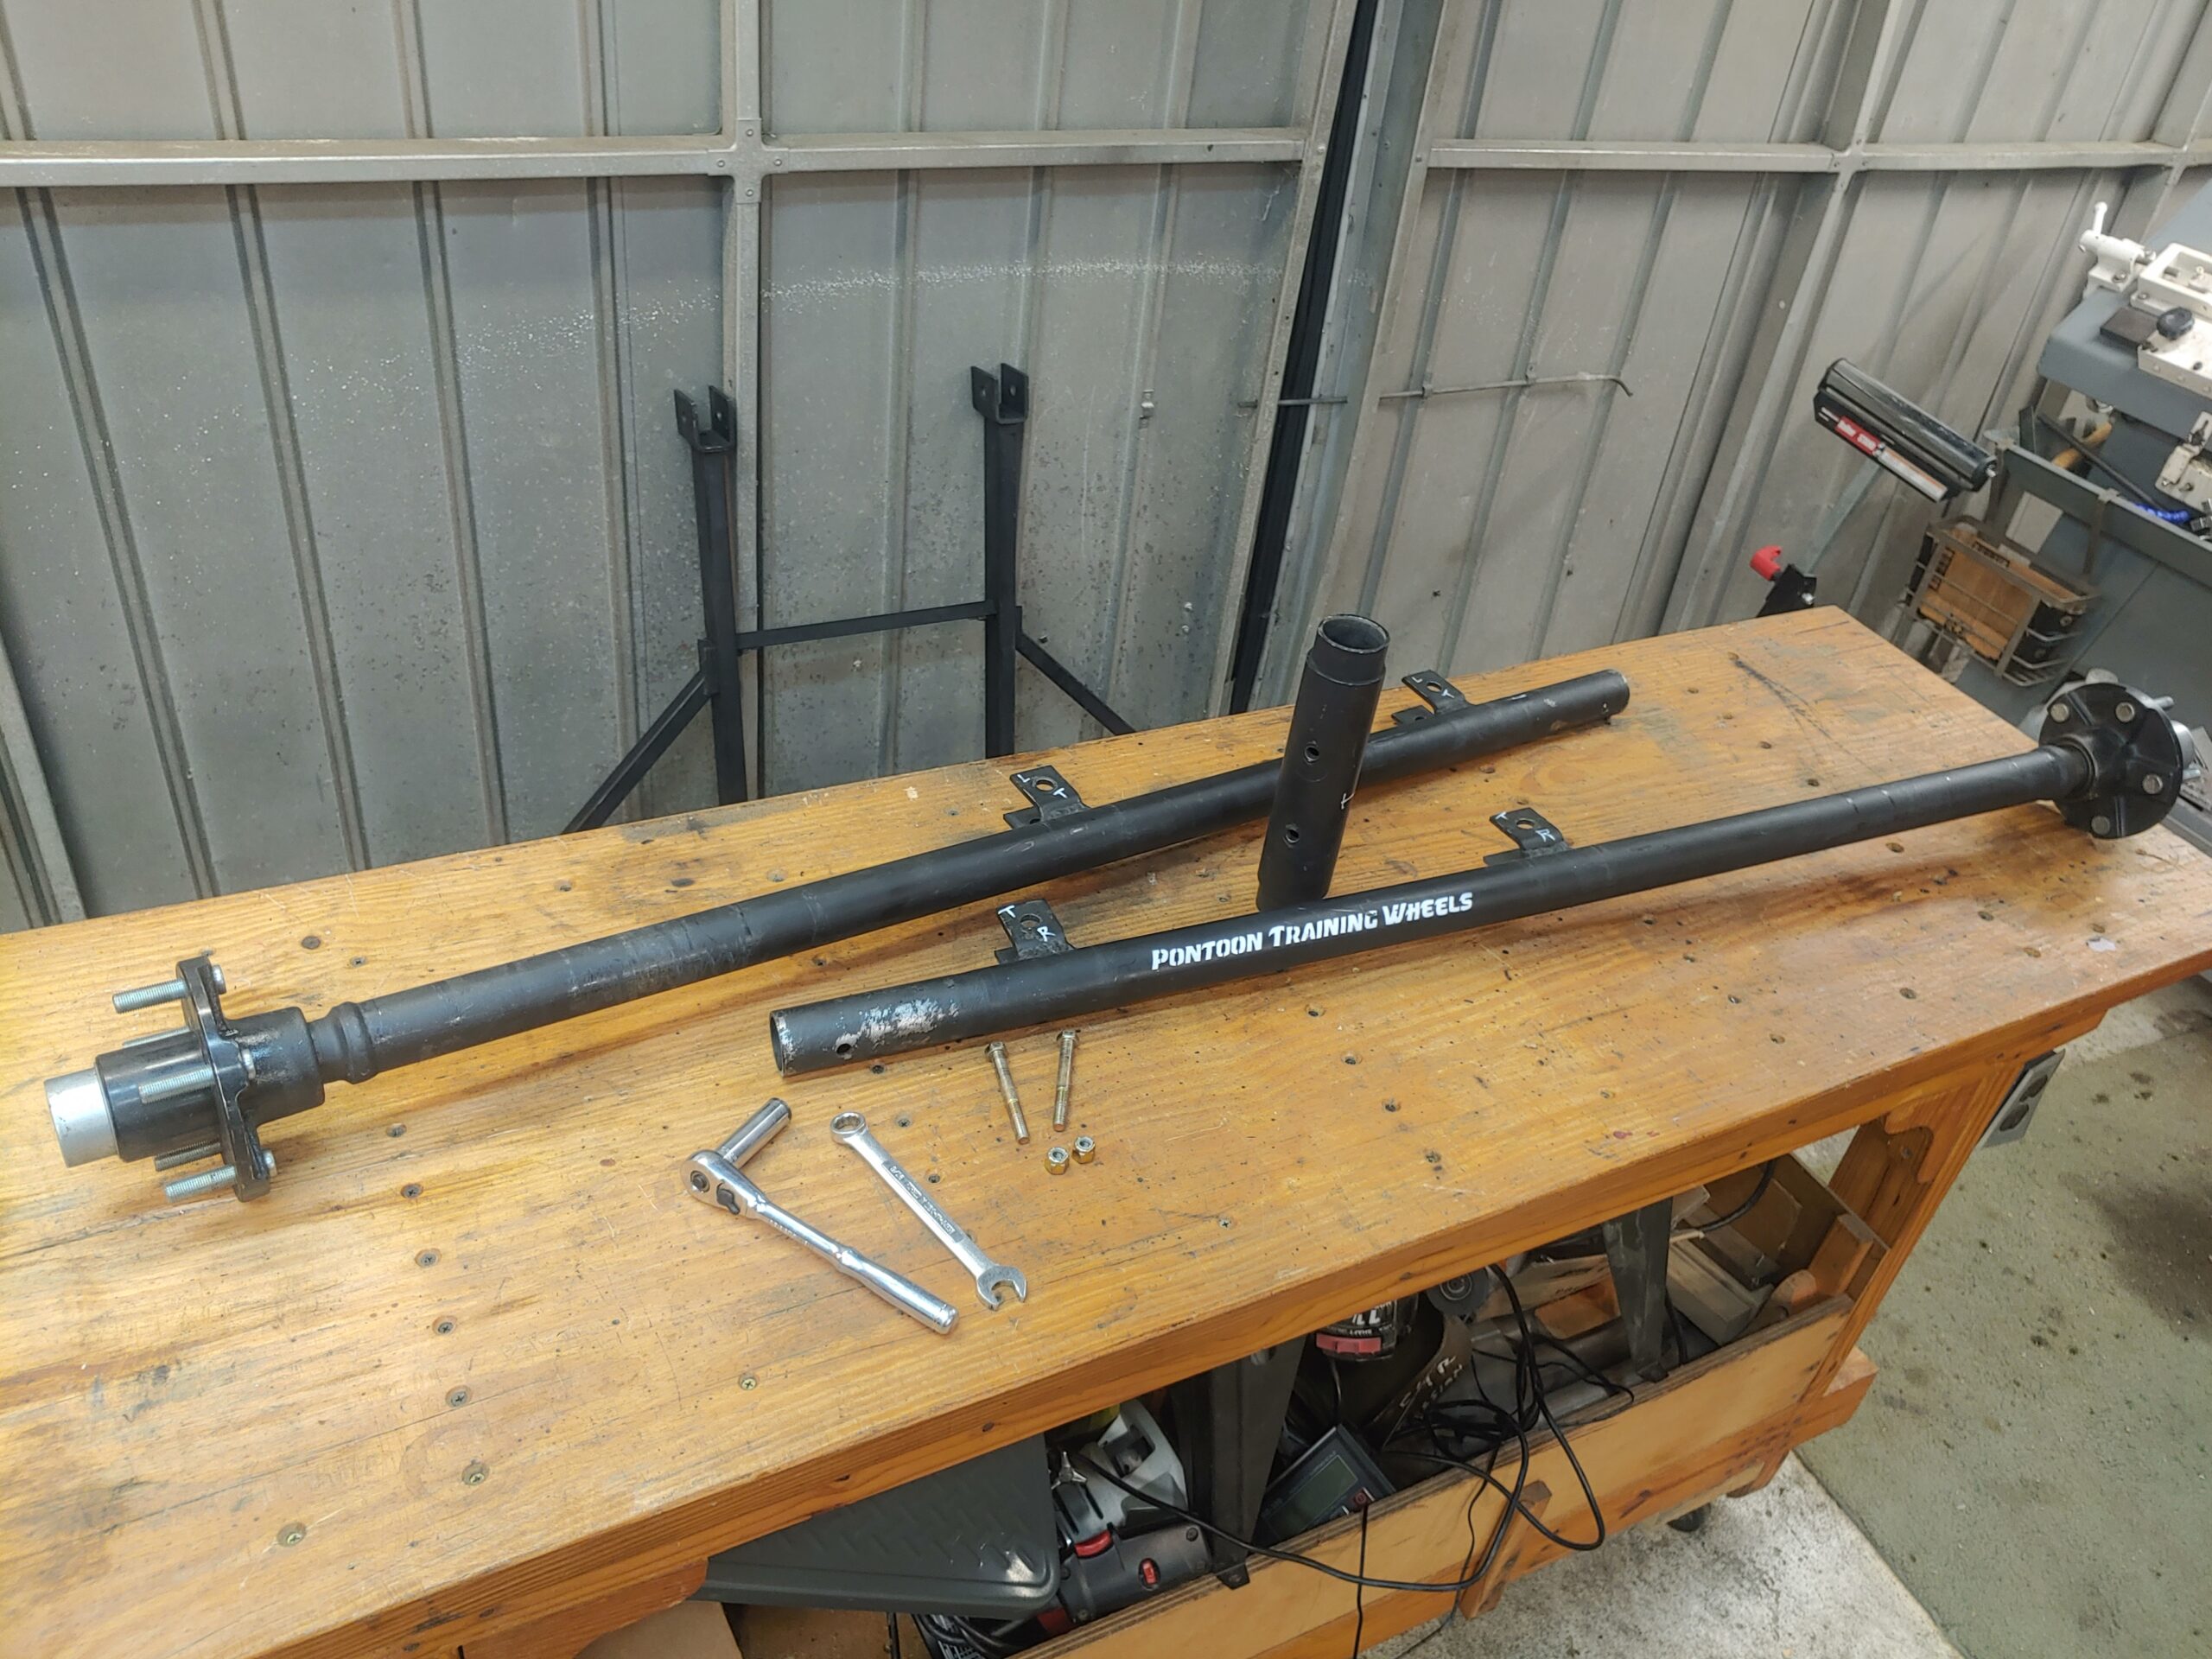
Get yourself a good table to work on, first step were going to assemble the connector Arms.
Lay Out your Parts on the Table – The Connector Arm parts are marked ” T ” for top and L & R for left and right. Ensure they are oriented correctly.
Slide the rear-support bar into its slot, fit the center connector between the front two connector arms, insert the 2 [3 ½”] bolts into the front connector arms. Then insert the 4 [2 ½”] bolts vertically in the rear-support bar. Once Everything is in, put on the nuts and tighten down the bolts.
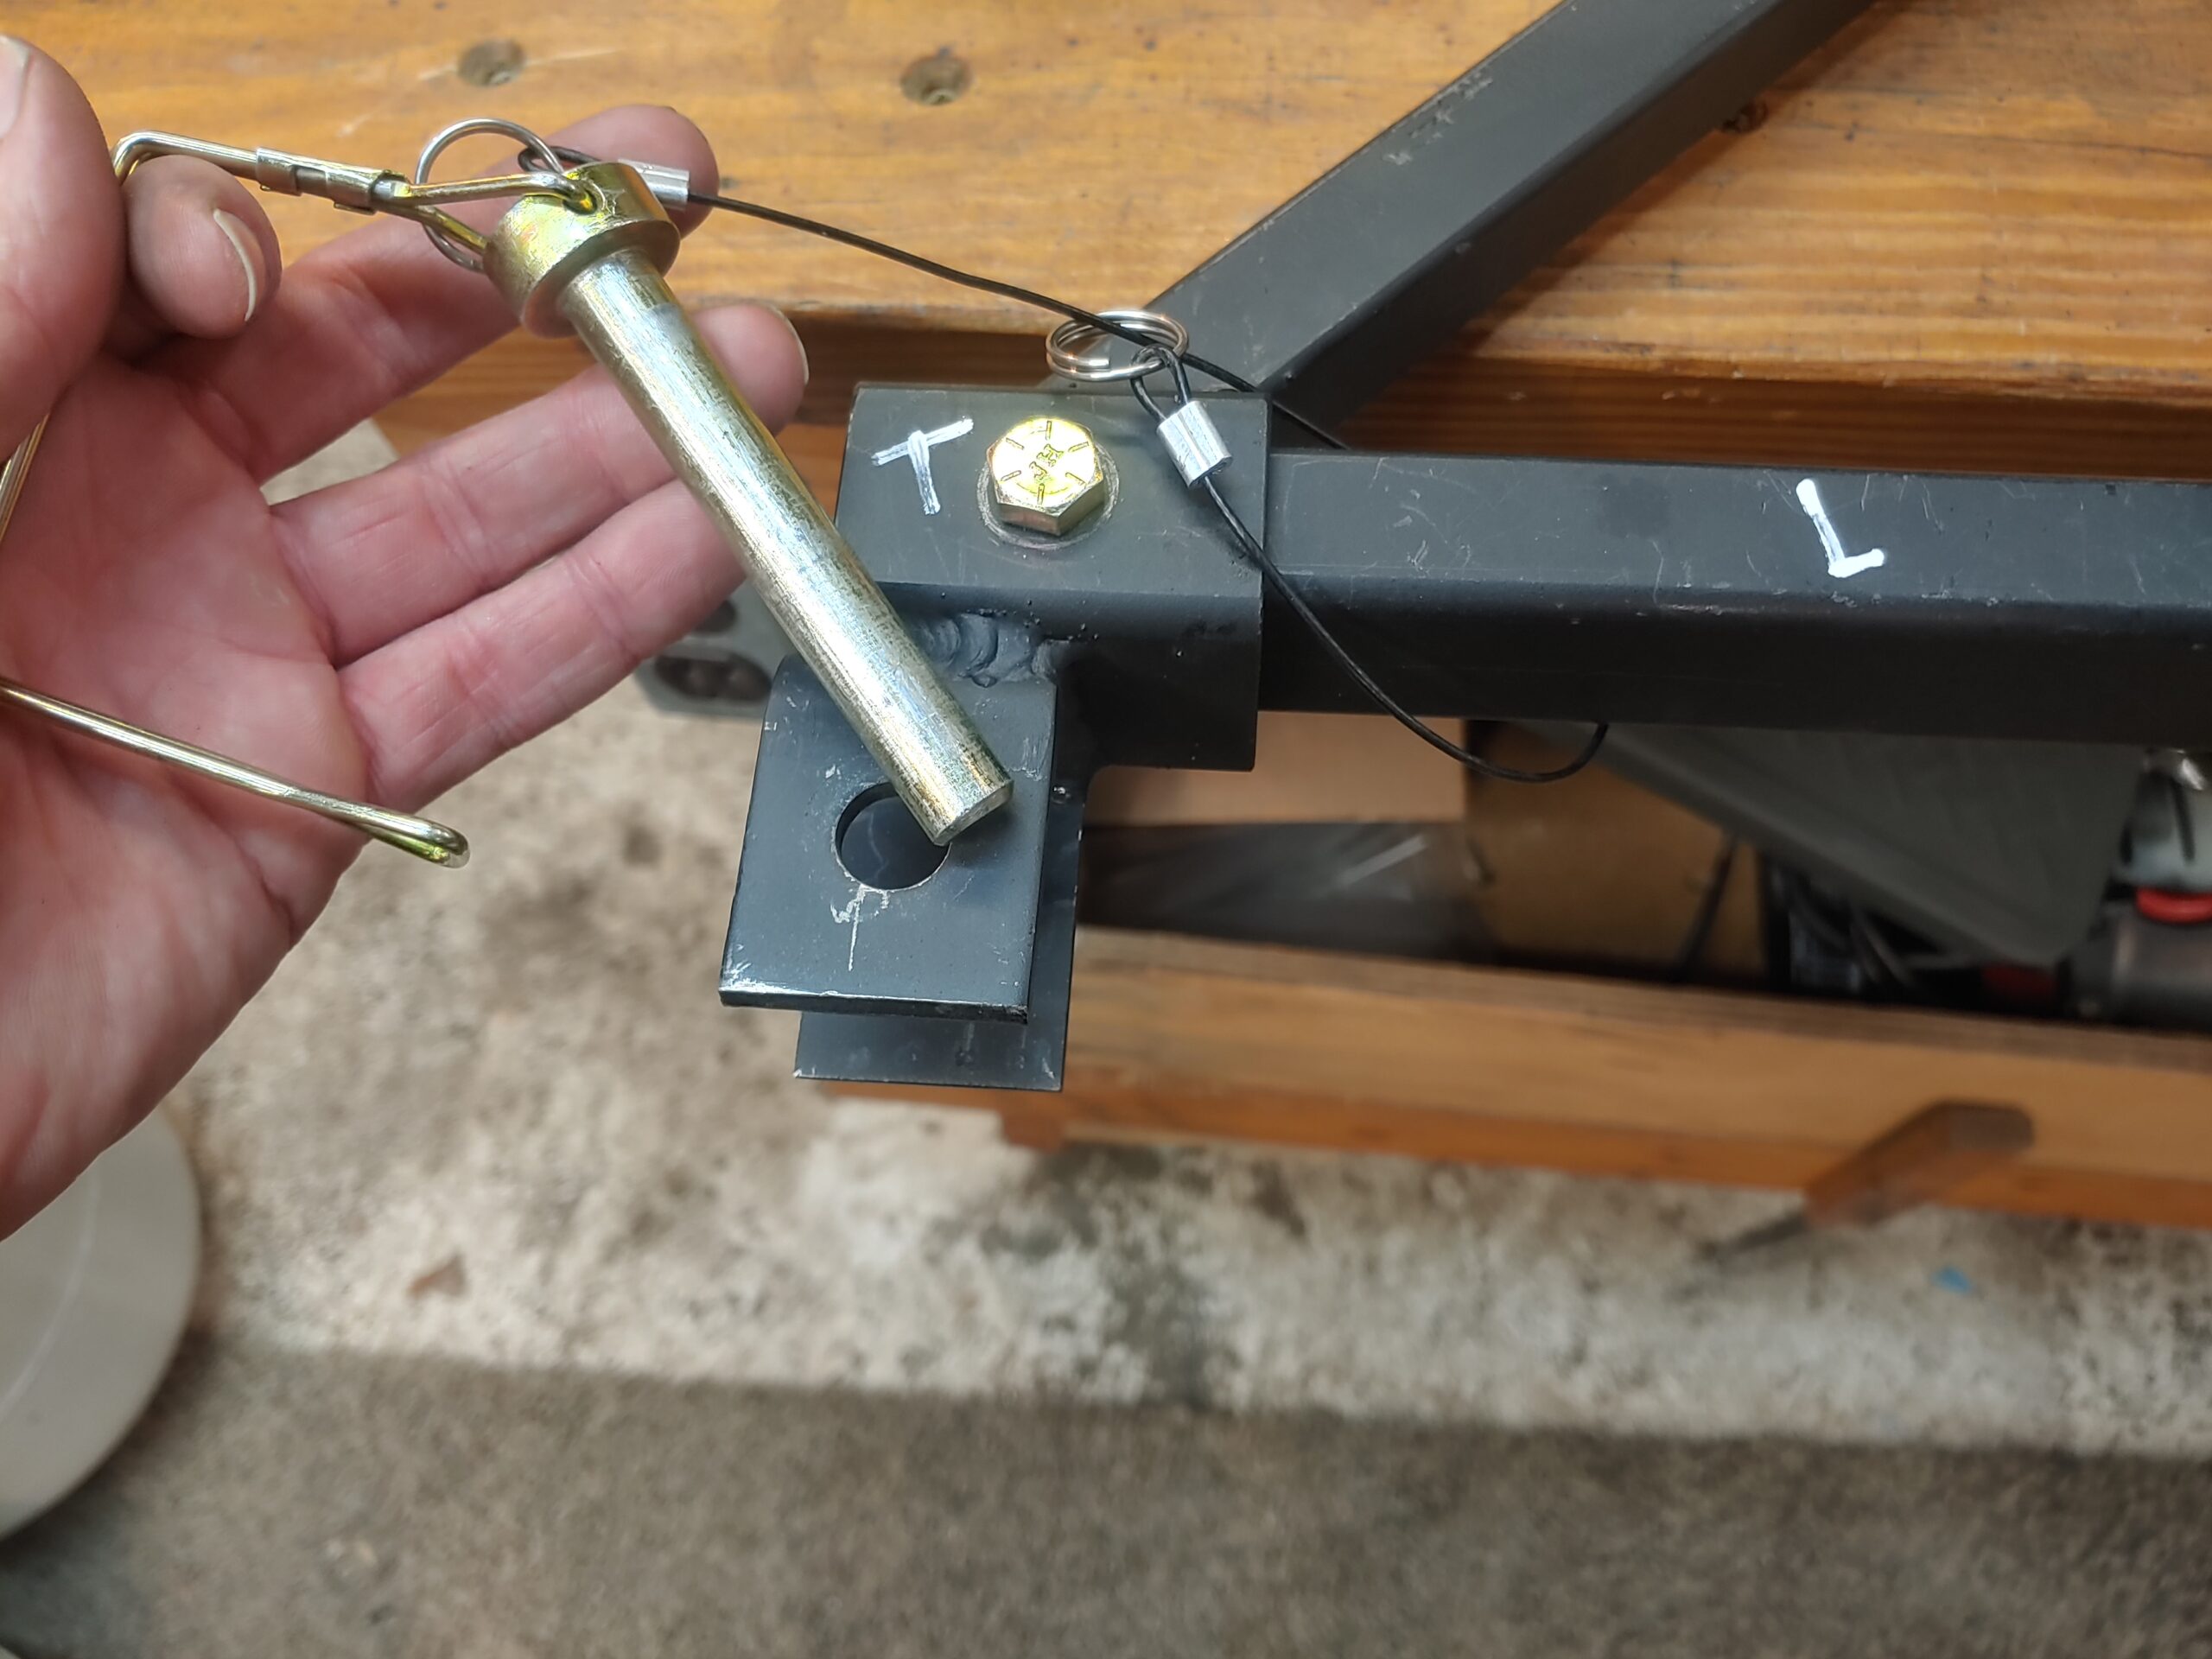
Loop the 1/2 inch locking pin Lanyards on the Rear-Support Bar.
your done with this step.
2.
Assembling
The Axle
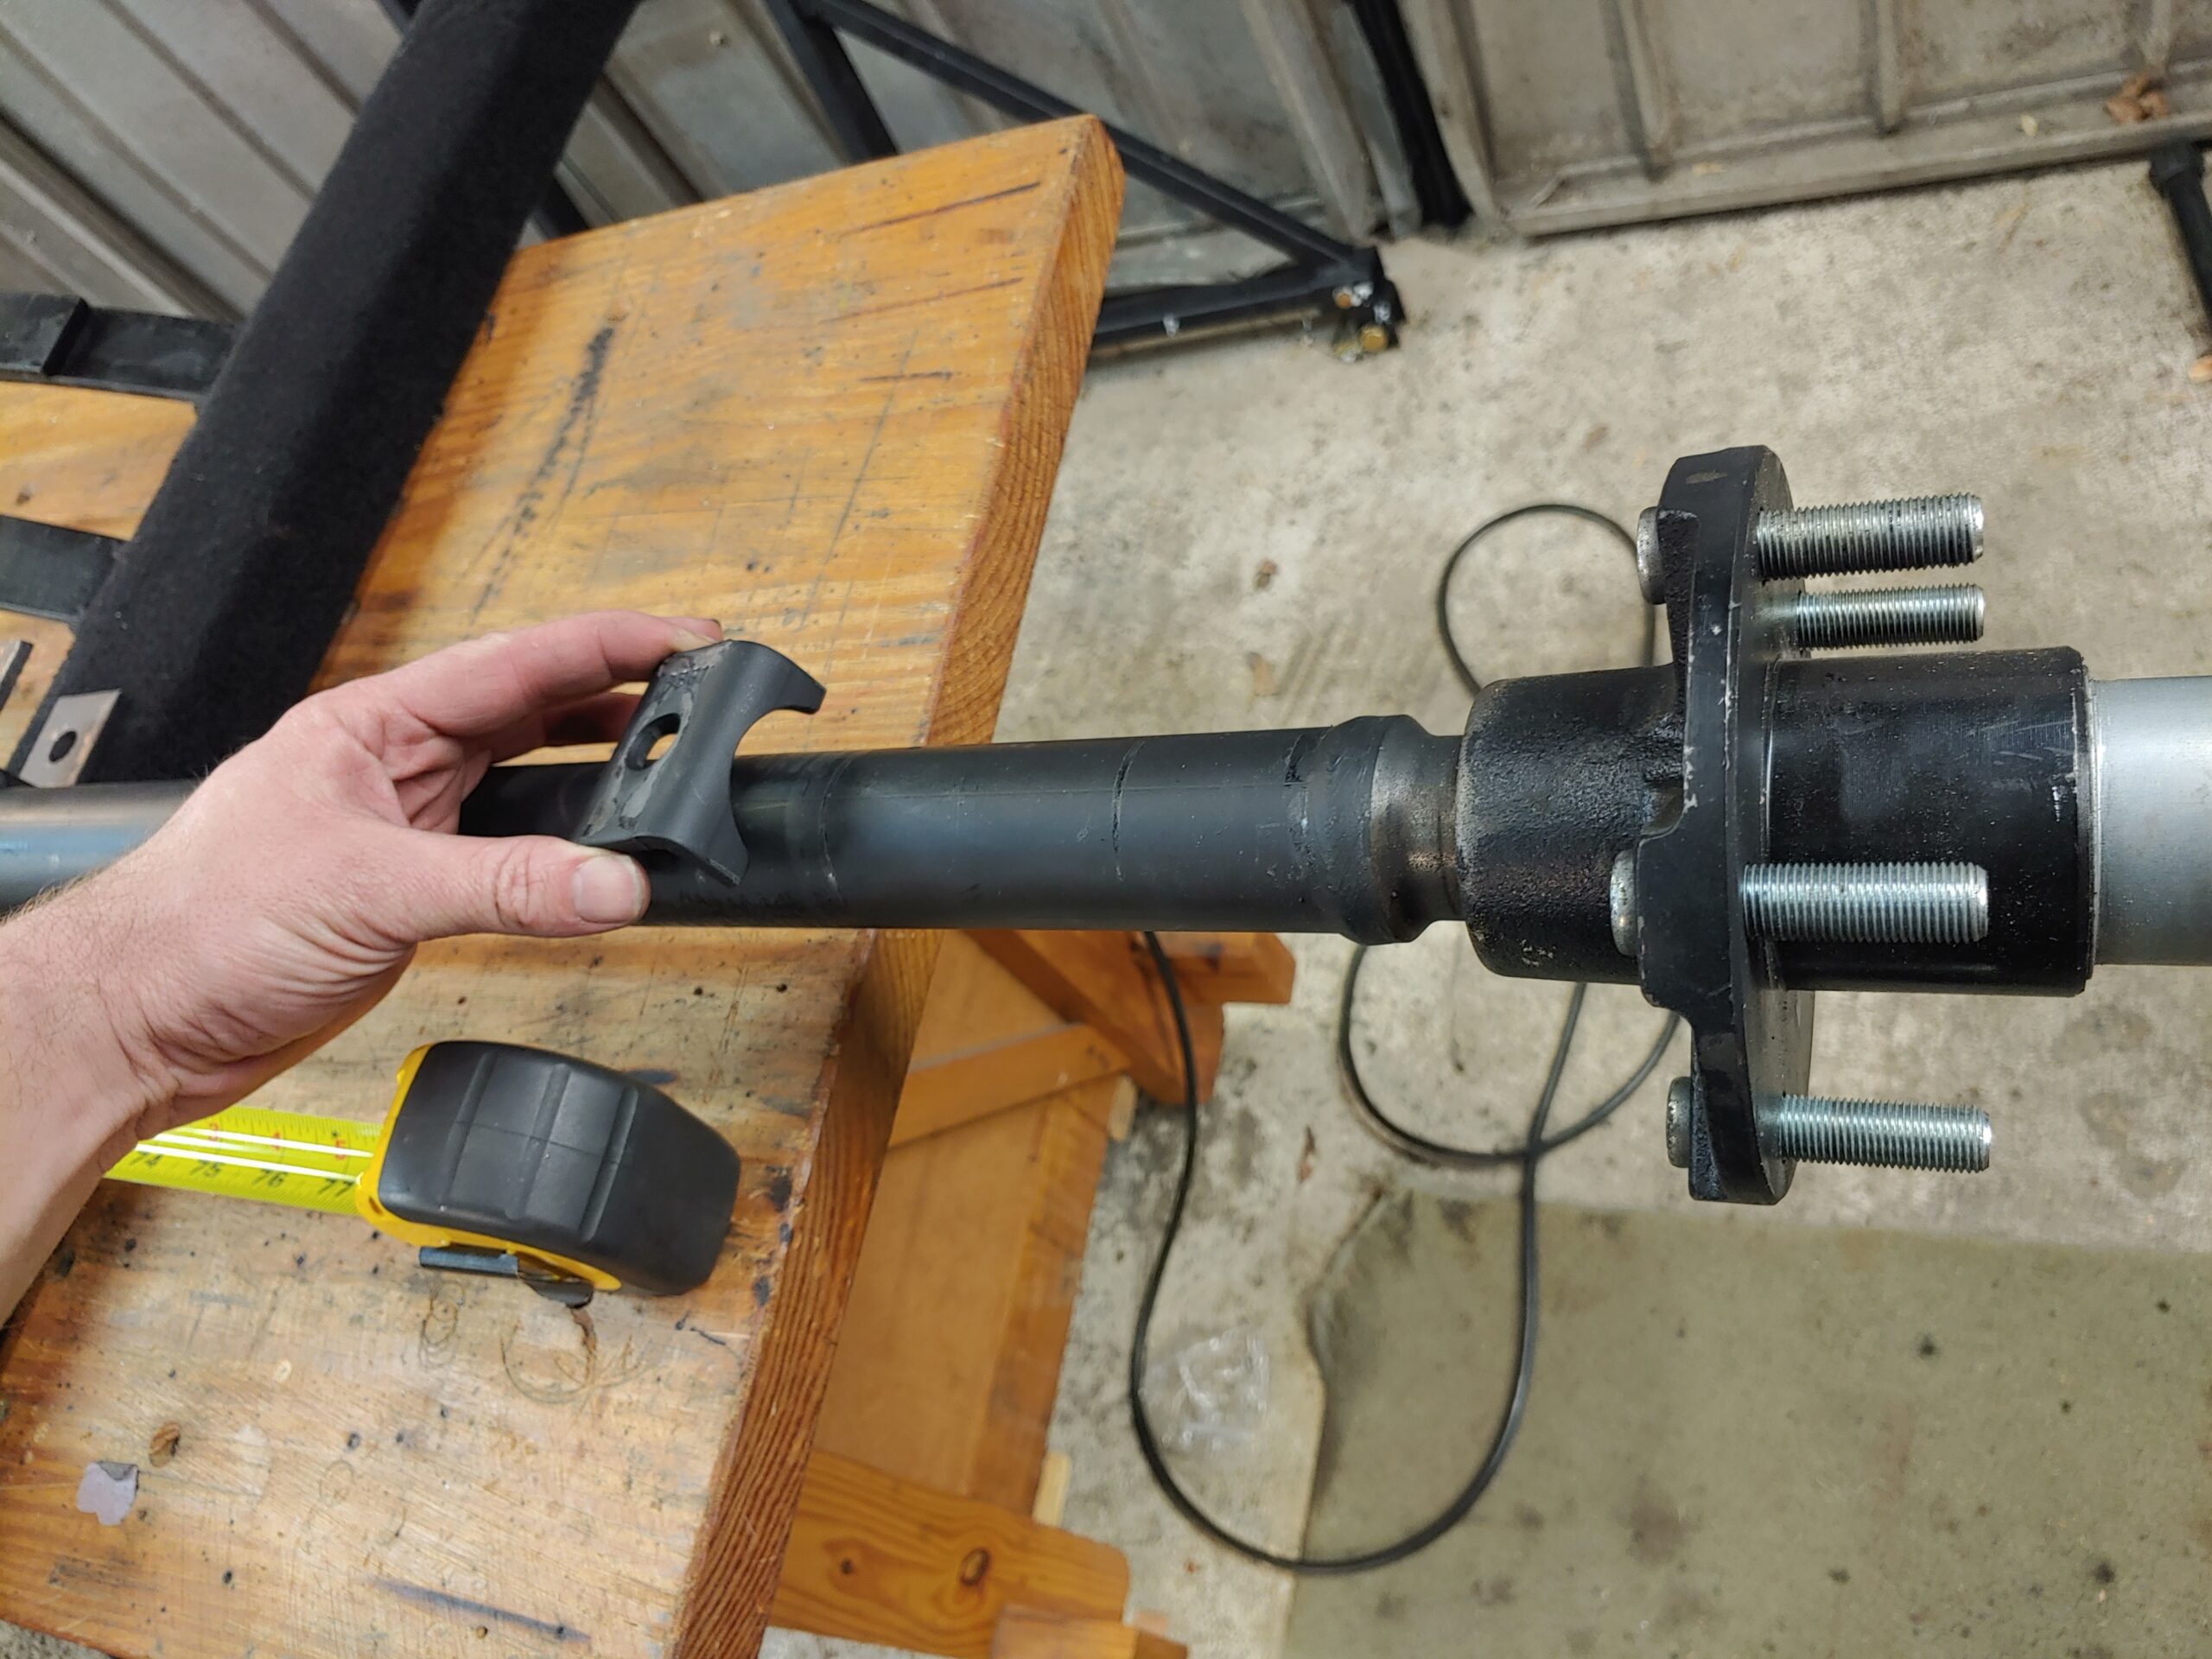
Lay Your Axle Parts out on the table, take note of paint markings and insert the axle half’s in the correct orientations.
Tools • 9/16 Wrench • 9/16 Socket
Parts • 2 qty. 3 ½” Bolts • Both Half’s of the Axle • Axle Coupler Sleeve
Dont Tighen Down the Bolts just yet, get the nuts on there hand tight for now.
Lay the Axle on Two of the Wood Carpet Blocks, or some small pieces of 2×4 wood you may have sitting around so that it is slightly elevated and doesn’t roll around.
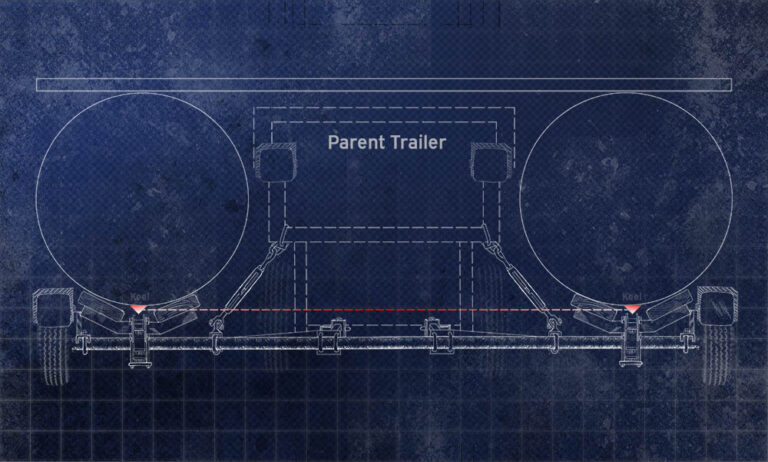
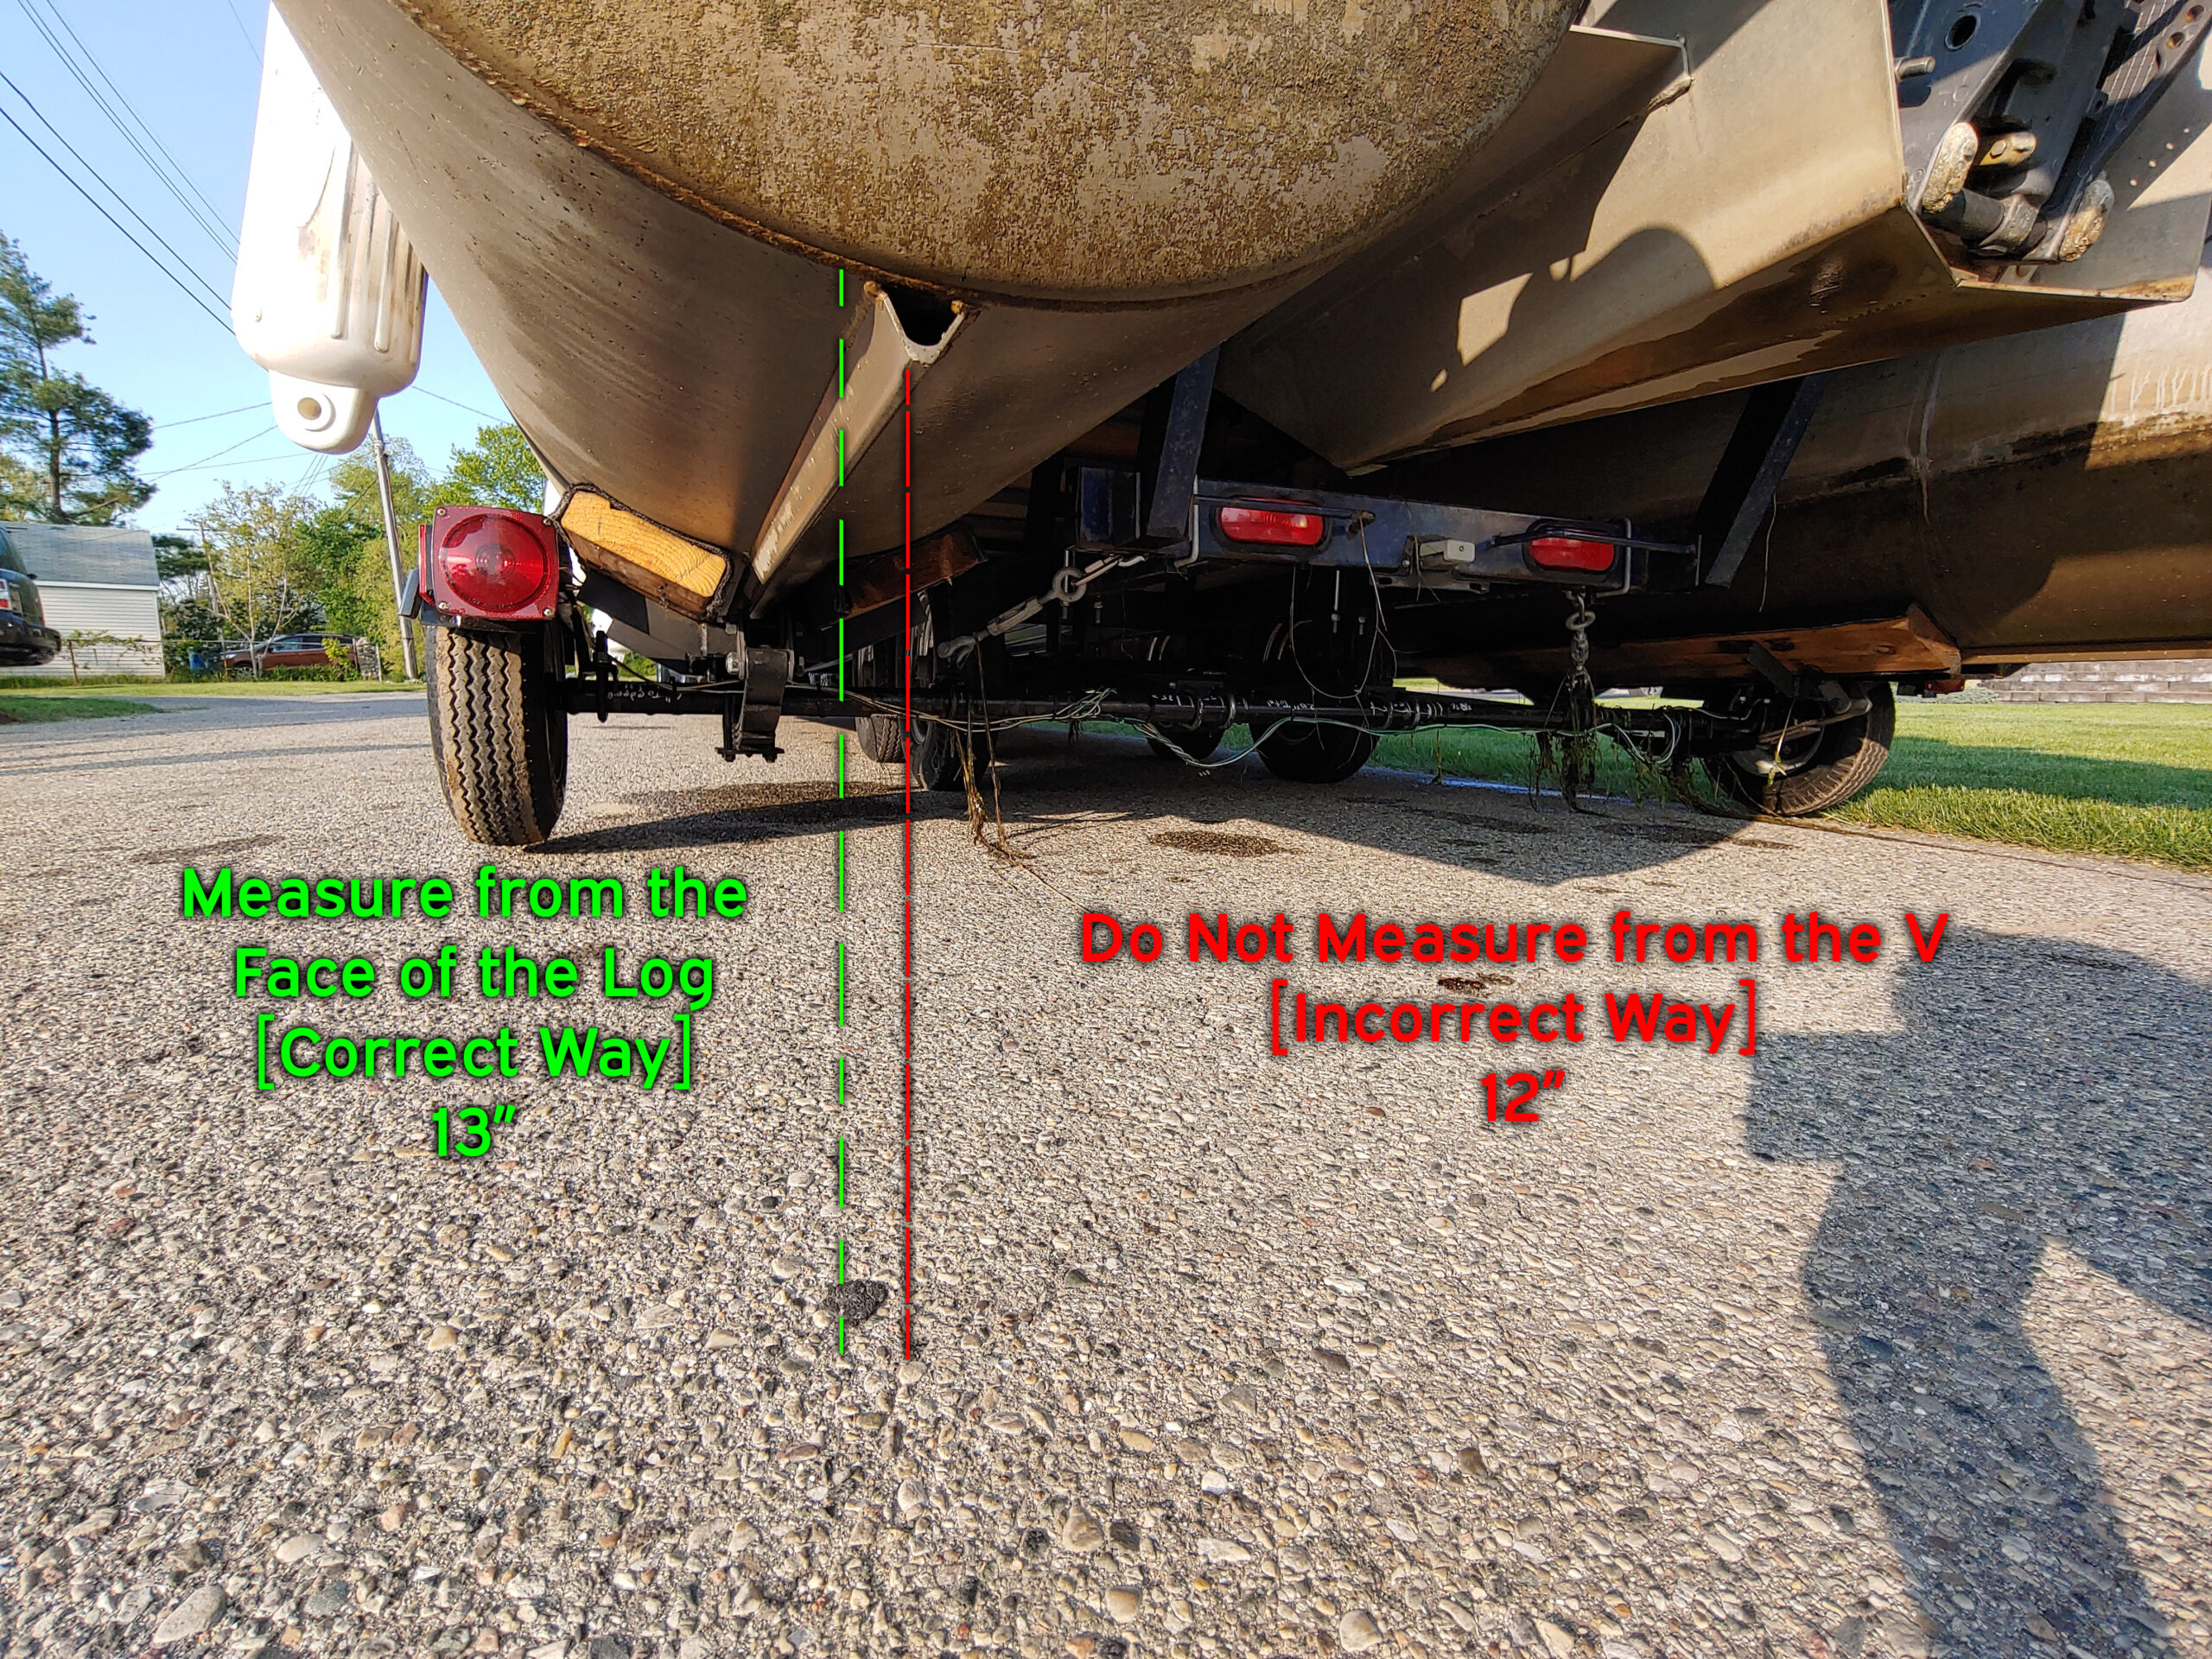
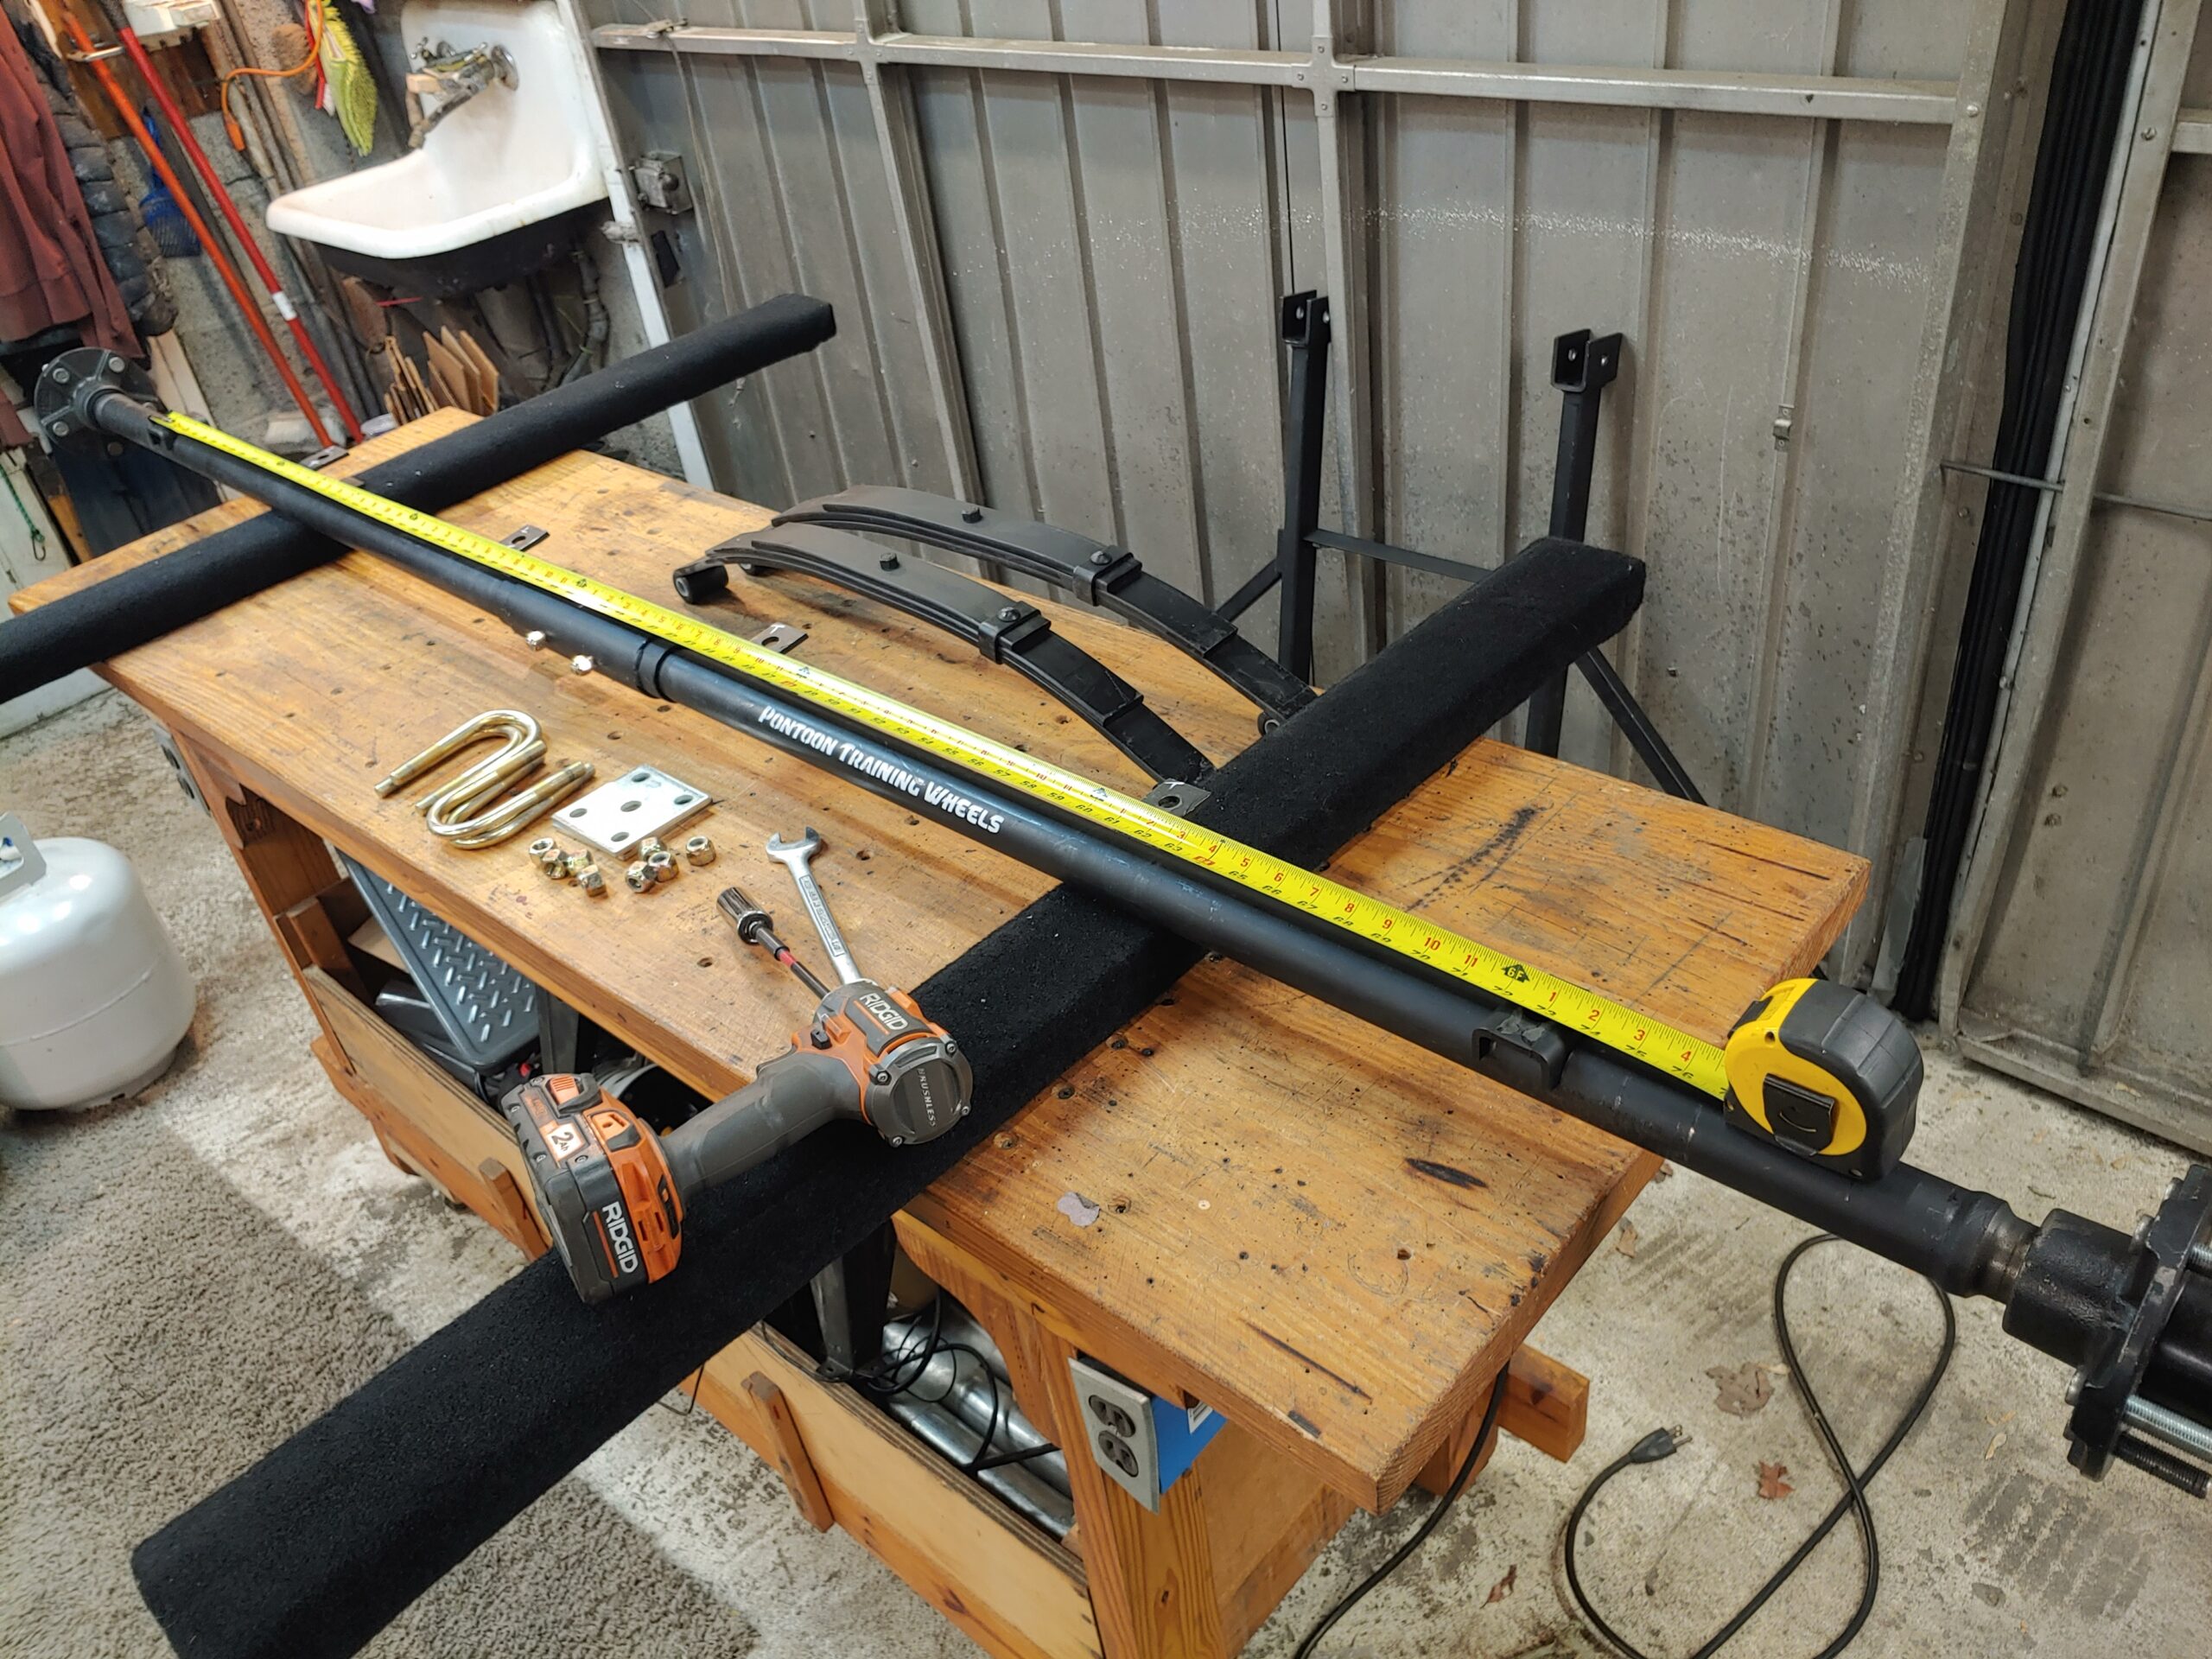
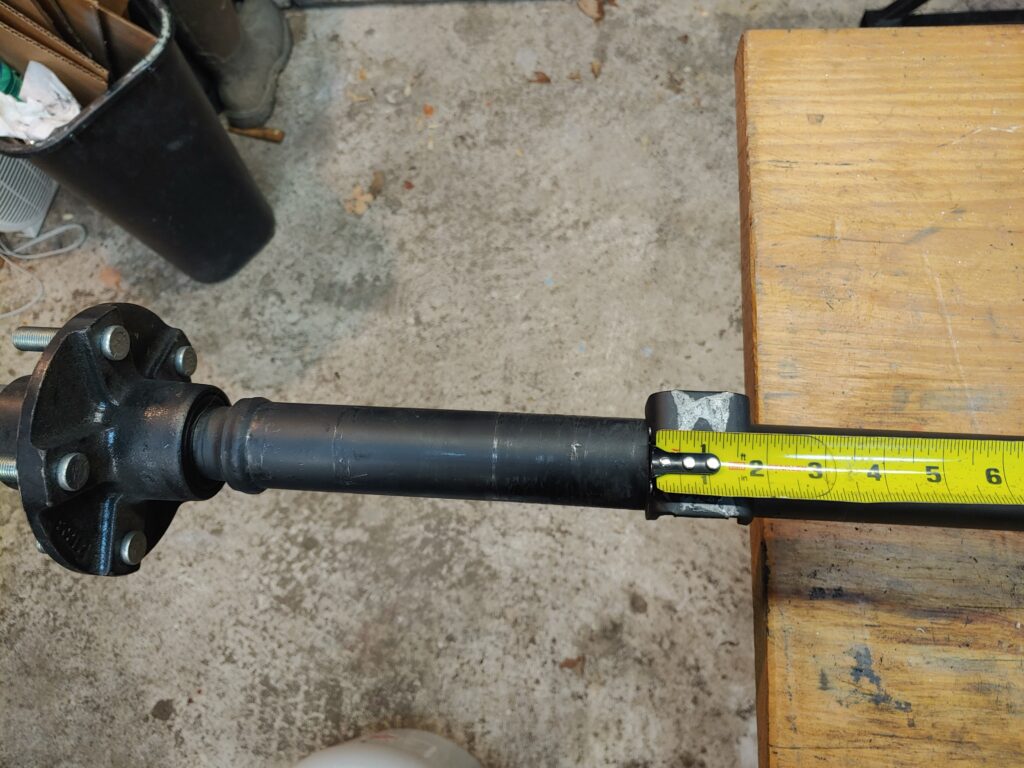
Measure Your Pontoons Keel to Keel to figure out where to place the leaf springs.
Place the saddles on the axle.
Use a measuring tape to measure out the correct distance between each saddle.
For Example this pontoon has a Keel to Keel of 72″
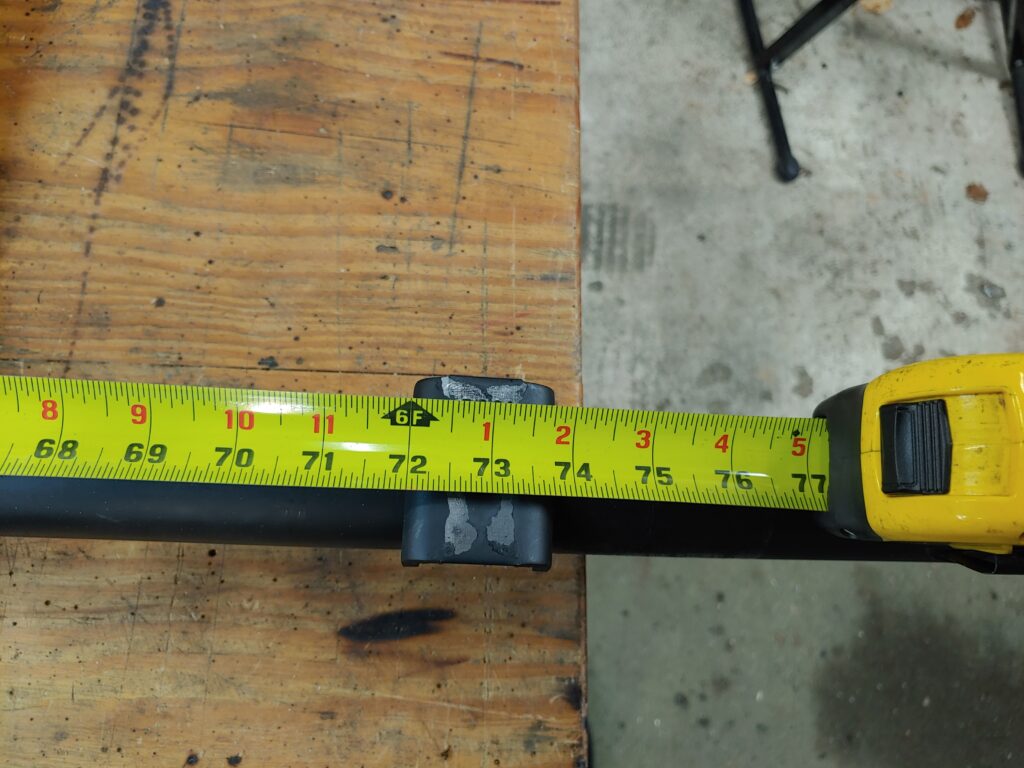
To ensure your cradles are centered. Measure from the Hub to the saddle and ensure that these numbers are eqaul on both sides of the axle.
Make sure you double check your Keel to Keel measurement.
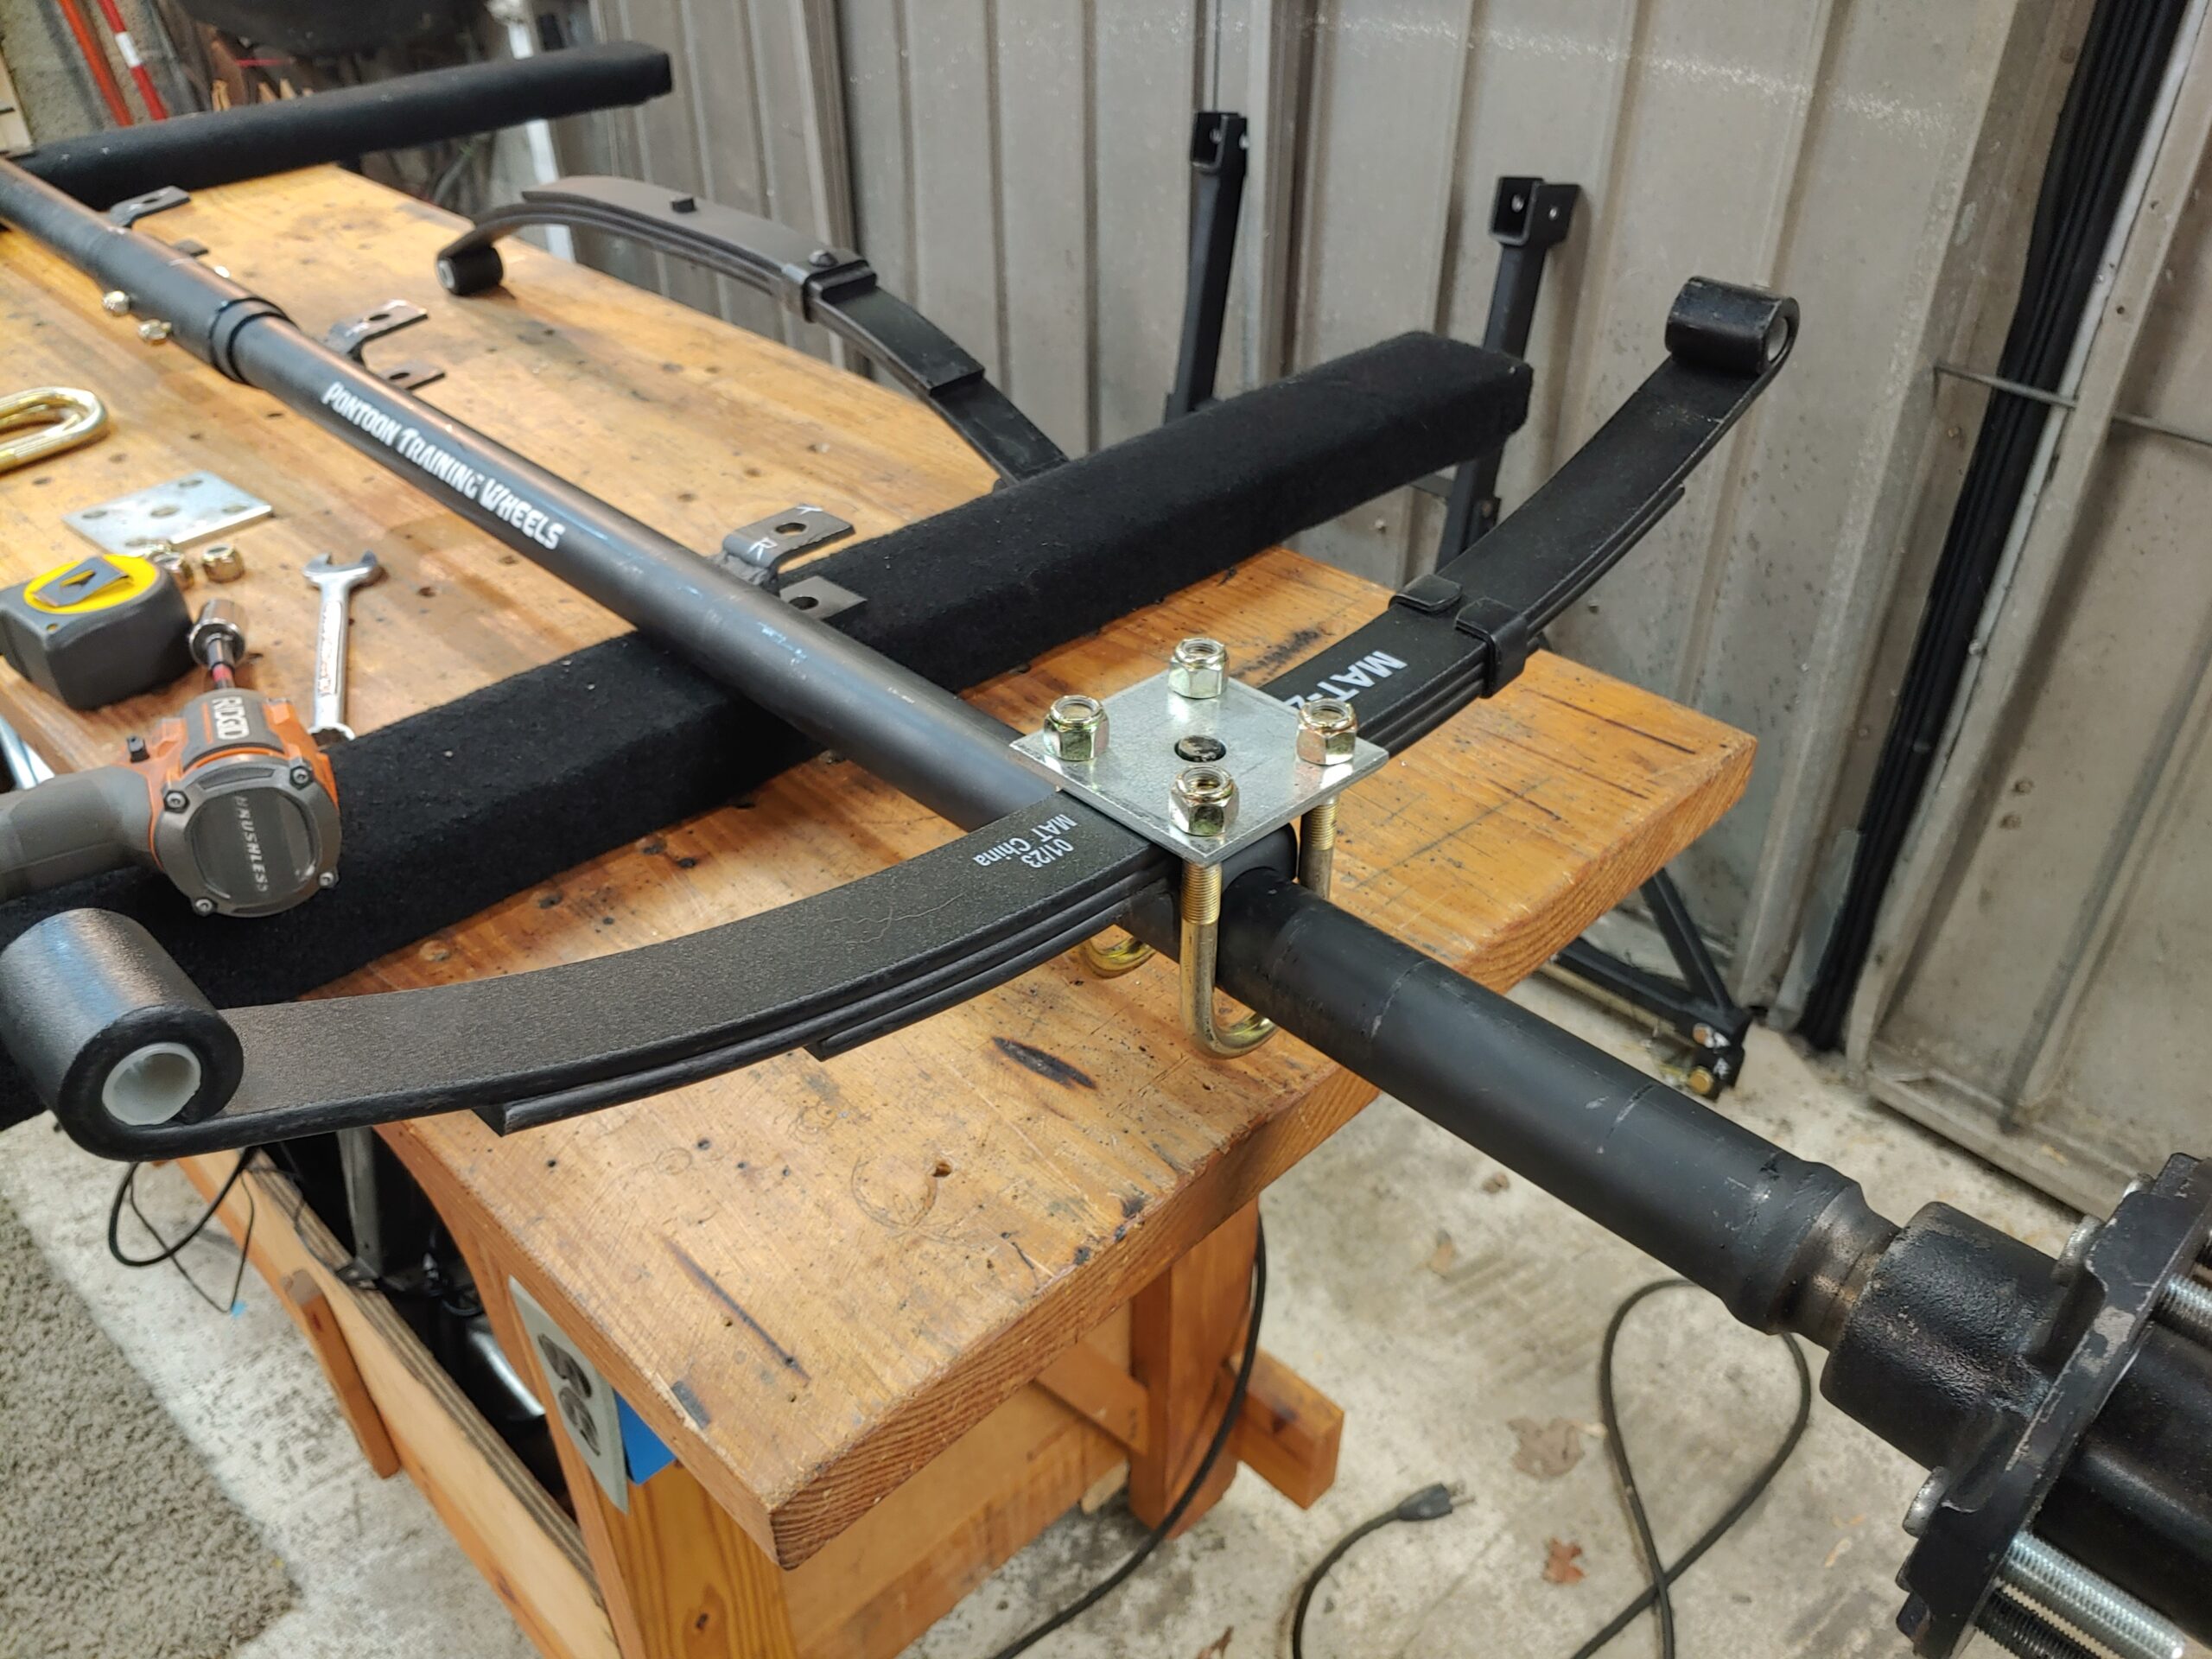
Place the leaf spring over the top of the axle and tighten down the nylock Nuts onto the tie plate. The clamp on the spring faces forward.
Note: if you have an older pontoon with a narrower Keel to Keel [ 73″ or less] there is an alternate configuration where the springs can be slung underneath the axle. This allows you to not have to use as many wood blocks up older trailers to raise the height of your trailers. Ground to Pontoon Clearance of [Underslung – 13.25″] vs [ Overslung – 16.75″] However this severely limits your trailers ability to carry any newer wider pontoon boats.
4.
Installing The Cradles
Tools • 7/8″ Wrench, •13/16″ Wrench
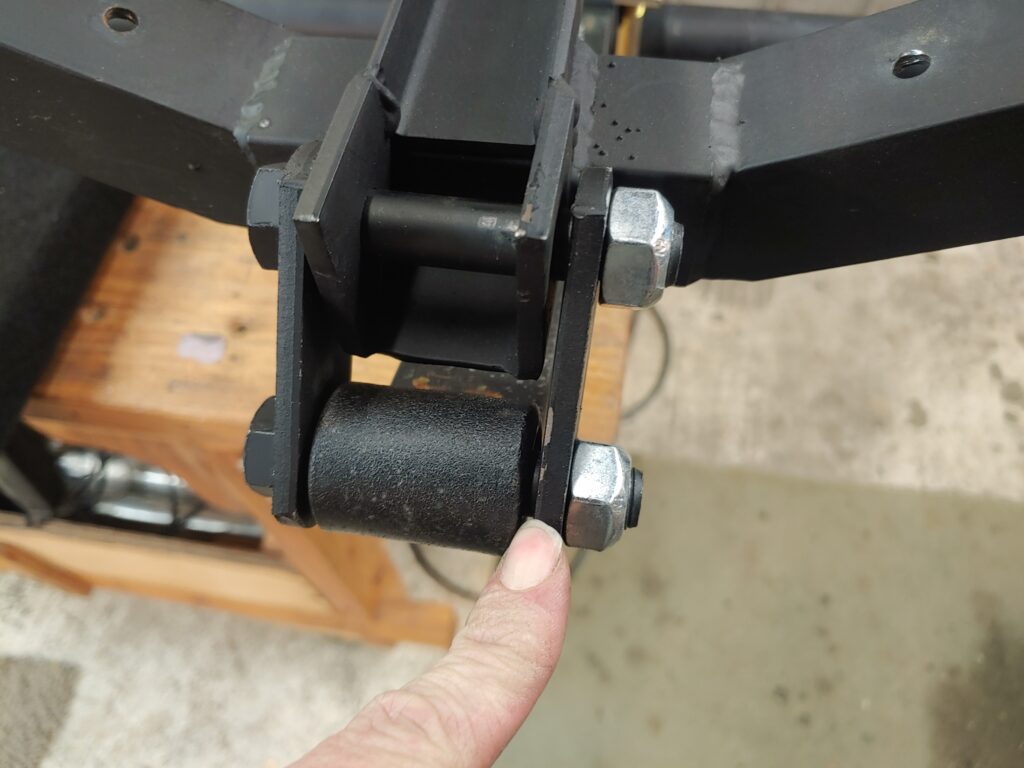
Parts • 2 Cradles • 6 Suspension Bolt • 6 Metal Lock Nuts • 4 Shackles
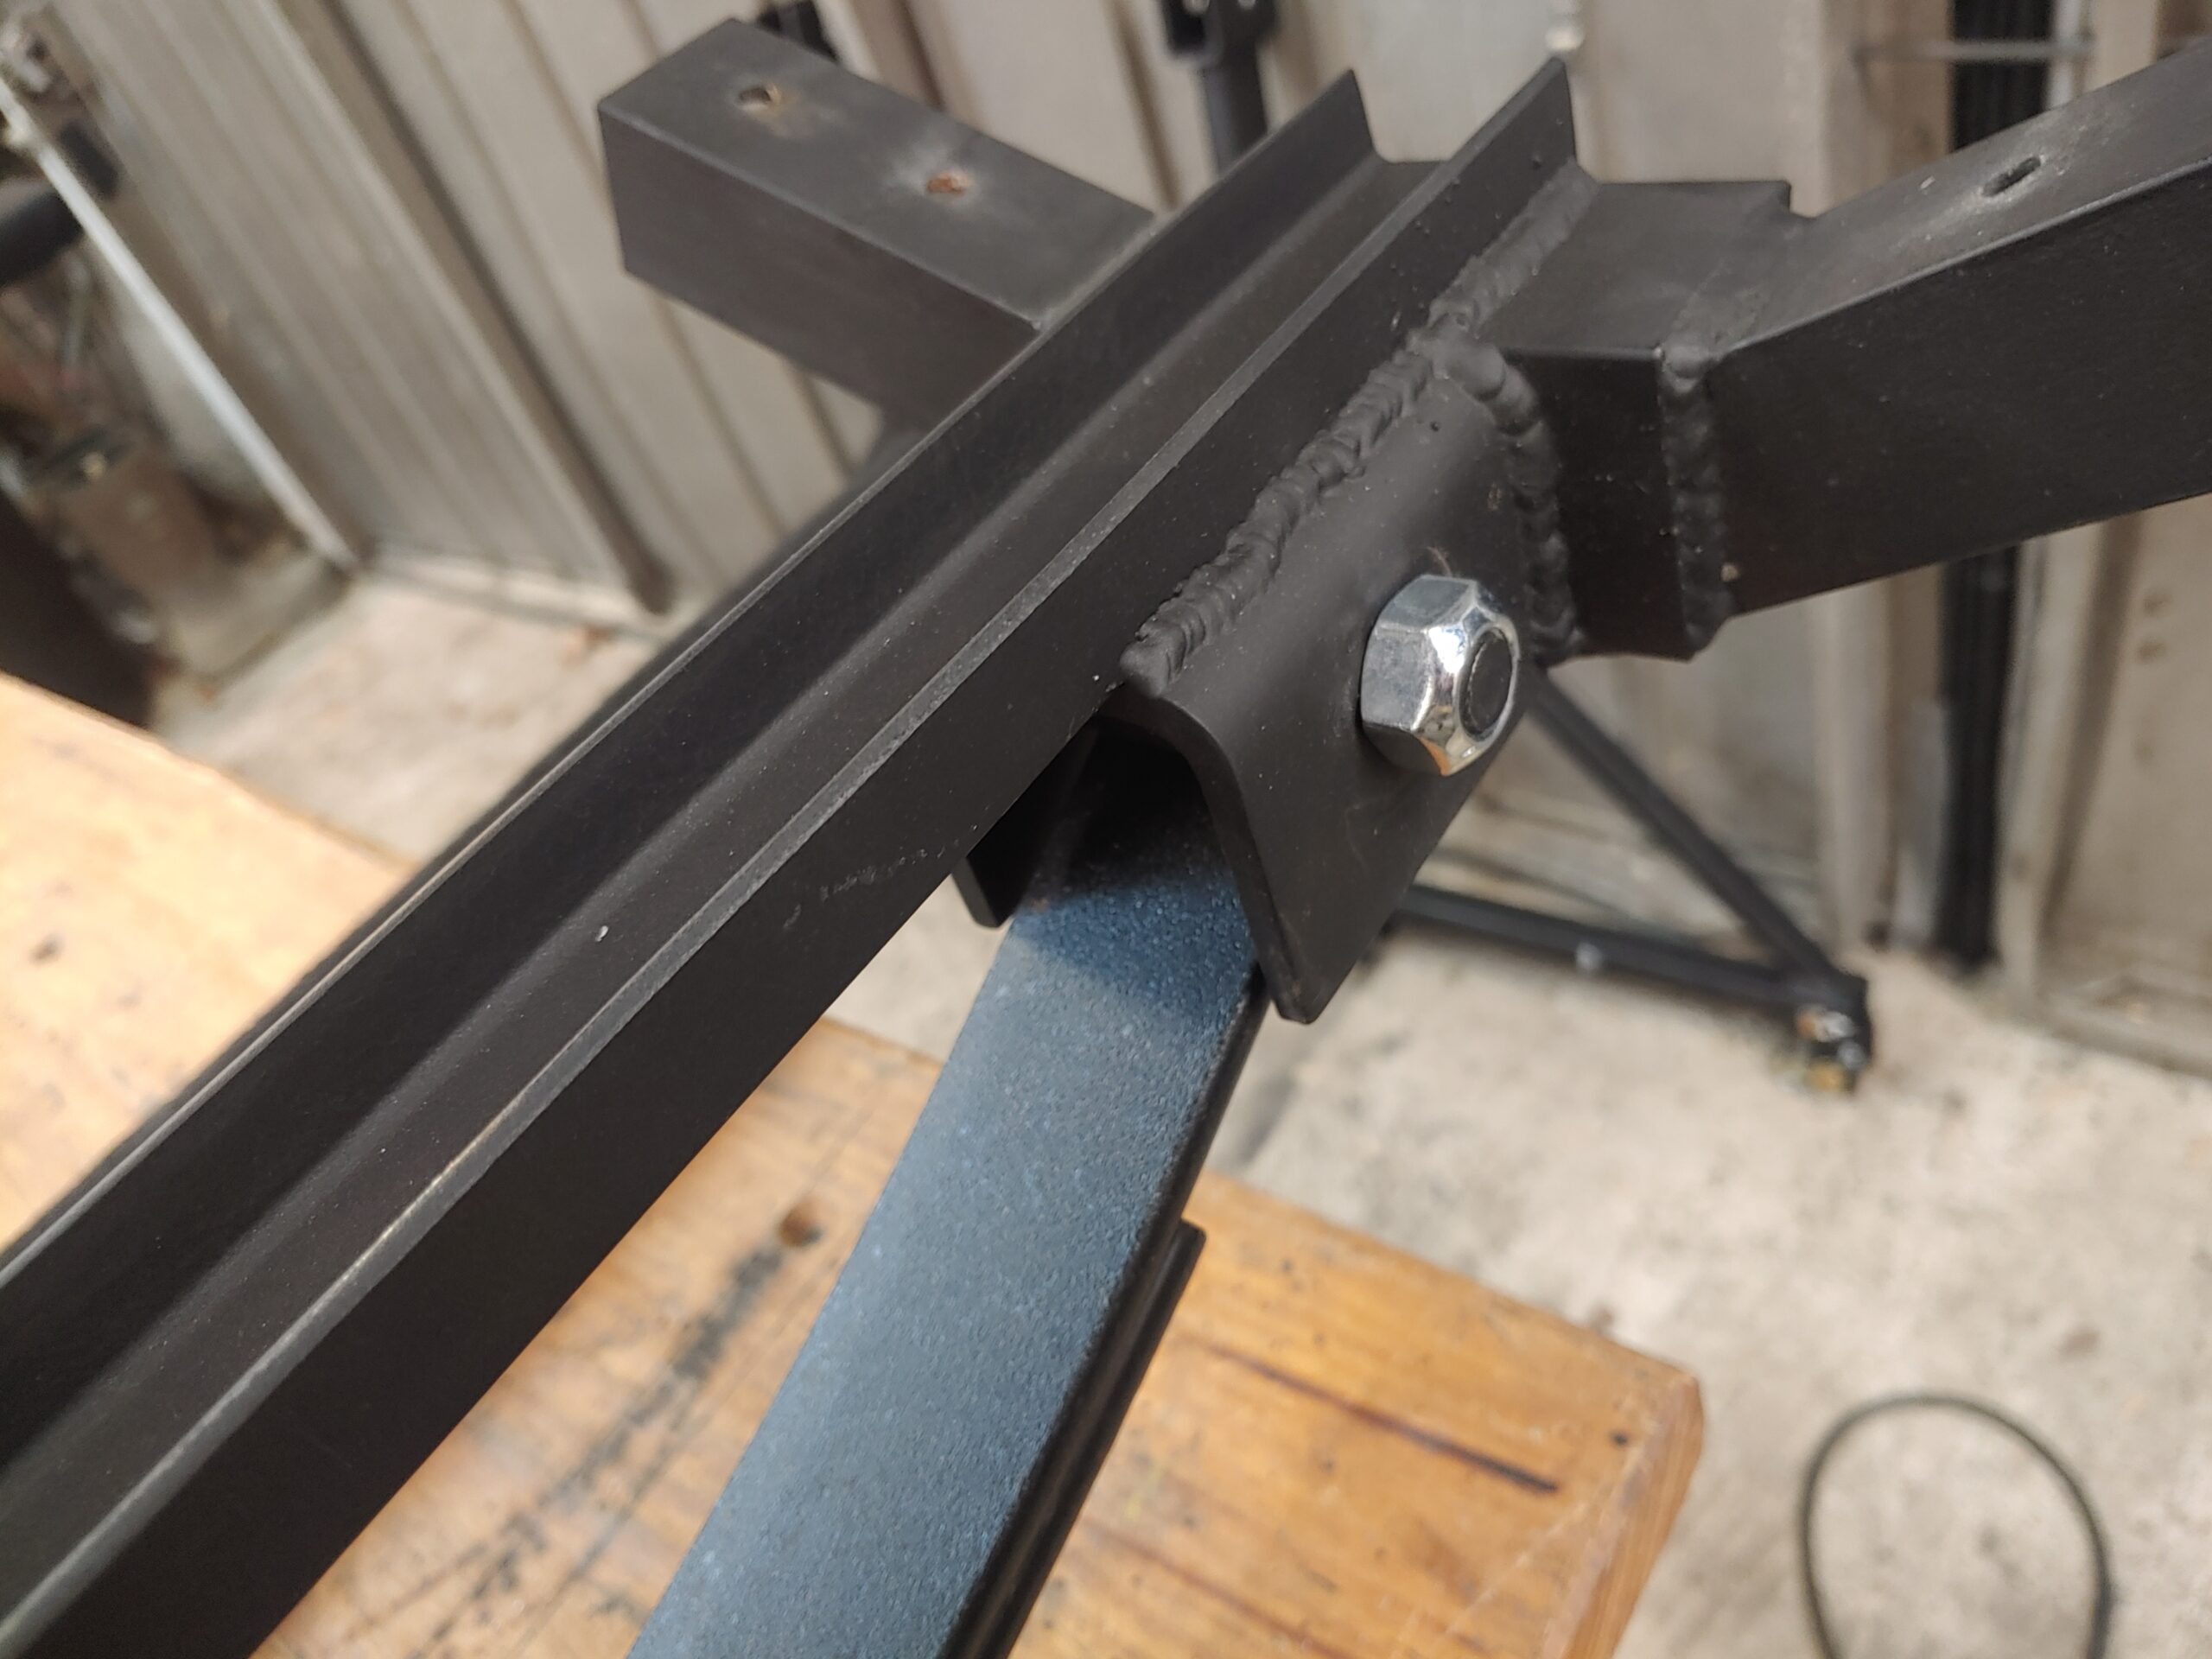
Insert the SuspensionBolts into the slot, make note that this is a special kind of bolt with Nerals on it to keep it from rotating in its hole long term. To Get the bolts in there, you must tighten down the nut pretty hard till you get the Bolt to sit flush against the metal. (if you cant quote get it flush that’s ok.)
Best to wipe some grease on the threads and the nerals to help everything go smooth.
These Shackle Bolts are pretty Straight forward to tighten up, I ship them pre-pressed into the shackles. Don’t Tighting these all the way down. Leave some play in the shackles. Note the small gap.
You must ascertain what size & shape your axle is on your trailer. The Unit Ships with 3 different styles.
2″ Sqaure 2 3/8″ Round 1 3/4″ Round
If yours is something different or there is some issue, visit our contact forum and give us a ringer or email us.
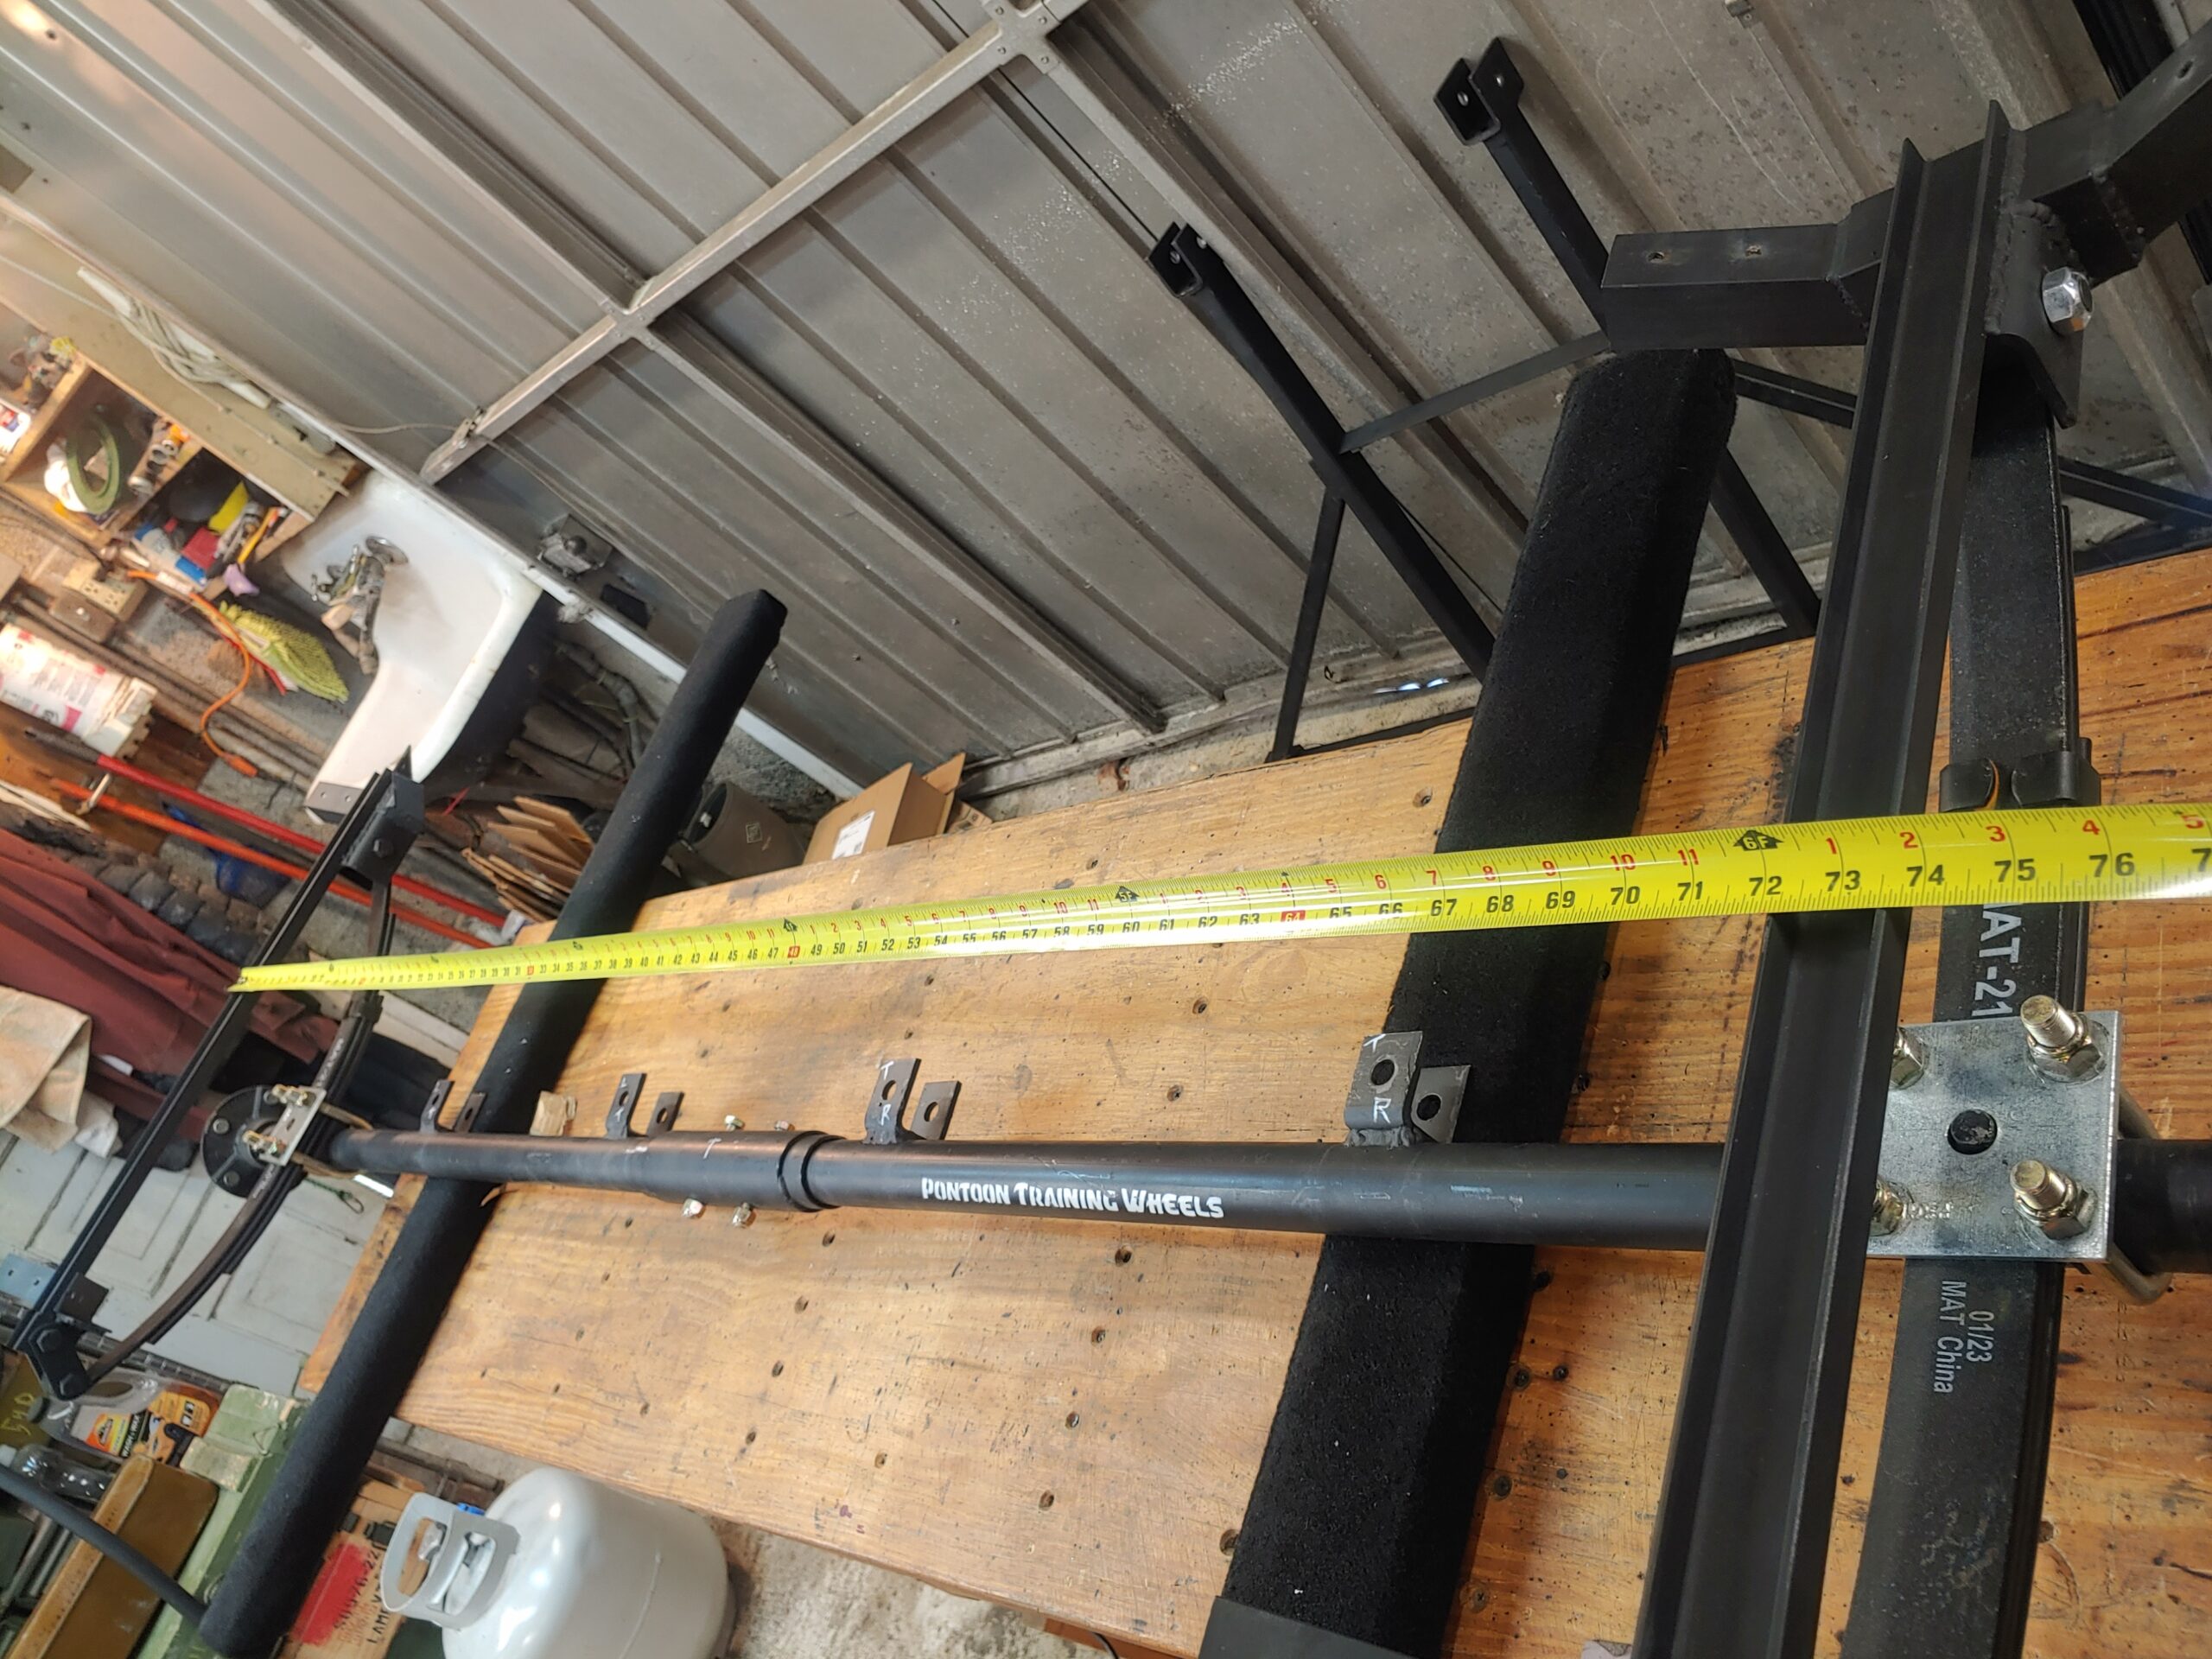
Lay out all the parts where you will be working. To attach the brackets, you will need to mount them centered on the trailer, and the correct distance apart from each other.
Measure your the ends of you connector arms for the Inside & Outside measurements. For Example, 13 1/4″ inside width, 17″ Outside Width.
Mount the Brackets on trailer. But dont tighten then, leave them just loose enough that you can adjust them. The trailer brackets are a little loosey-goosy on the fit, try to find the best average.
So, for instance, if you can get 13″ [inside] & 17 1/4″ [Outside] you would be doing really well.
To ensure the brackets are centered on the trailer, find some fixed point on each side, such as the trailer hub, and measure to ensure each bracket is the same distance from each hub.
once you have double checked all the measurements. Install the connector arms using the 1/2 ” hitch pins. Place the handles of the pins facing in.
Place the ratchet straps around the rear bracket of your trailer. Try to place them as wide as possible. The wrap them around the support bar of the connector arms.
At this point, you will need to install the Pig-tail wiring harness onto your trailer wiring to be able to plug in the lights for the wheels.
Video of rolling the wheels on and attaching them. You will have to tweak the height of the connector arms initially with the RatchetStraps.
The Axle brackets fit over the the connector brackets. So when you tighten the ratchet straps it puts upward tension of the axle and sucks the cradles up to the pontoons.
The Stabilizer Wheels Ideally float about 1/4 – 1/2 [so like 3/8″] off the ground, this allows them to come off quickly if needed.
Anything higher then a 1/2″ starts to degrade stabilizing benefit of the wheels. Good news if your boat sits too high, you can tweak the height of the trailer using the scissor function, if you need the boat to sit lower.
It is perfectly fine if the wheels contact the road all the time. They are 6ply freeway rated tires.